Introduction
Thank you for purchasing a WordPress Theme. This documentation consists of several parts and shows you the entire process of setting up and administering a WordPress Website from scratch.
What is WordPress CMS?
WordPress is a free and open source blogging tool and a content management system (CMS) based on PHP and MySQL. It enables you to build Websites and powerful on-line applications and requires almost no technical skills or knowledge to manage. Many aspects, including its ease of use and extensibility, have made WordPress the most popular Web site software available. Learn More
What is a WordPress template
A WordPress template is a skin for a website built with the WordPress CMS platform. In other words, you can easily change your WordPress Web site appearance by installing a new template in a few easy steps. With all its simplicity, a WordPress template is provided with all the necessary source files and you are free to edit or extend it the way you need.
Help and Support
- mail us: support@starthemes.net
Files structure
The template package you have downloaded consists of several folders. Let's see what each folder contains:
- documentation - contains documentation files.
- documentation.html - the main documentation file. You are right here :)
- screenshots - contains template screenshots. Not for production.
- theme - contains WordPress theme files.
- theme####.zip - this folder content all the necessary files for the theme.
- sample_data - contains files that can make your WordPress website look like our live demo.
- sample_data.xml - contains all template sample data (posts, pages, categories, etc.).
- various images and other media files
- manuall_install - contains files that can make your WordPress website look like our live demo.
- uploads - contains theme images.
- theme#####.sql - database backup file (contains theme content).
- license.txt - contains license details.
- readme.txt - contain information about theme images path and font use and usage scritps.
Template installation
Template installation is very easy process. The installation process includes only two simple steps: theme installation and sample data installation.
All installation steps can be done within WordPress interface. It makes process comfortable and fast.
Step 1. Theme installation
- Go to the menu Appearance > Themes and click the Add New Theme button.
- Click the Upload link.
- Click the Browse button and navigate to the unzipped template package on your computer.
- Look for a file called nutrella-pro.zip Click on it to select, then click OK.
- Click the Install Now button and wait until the installation is complete.
- Click the Activate link to change the current layout of the site to the theme your purchased.
- Go to Appearance >> Theme Options >> Restore Default.
Congratulations, your theme have been successfully installed!
Step 2. Sample Data Installation
To make your WordPress website look like our live demo, please follow the instructions below.
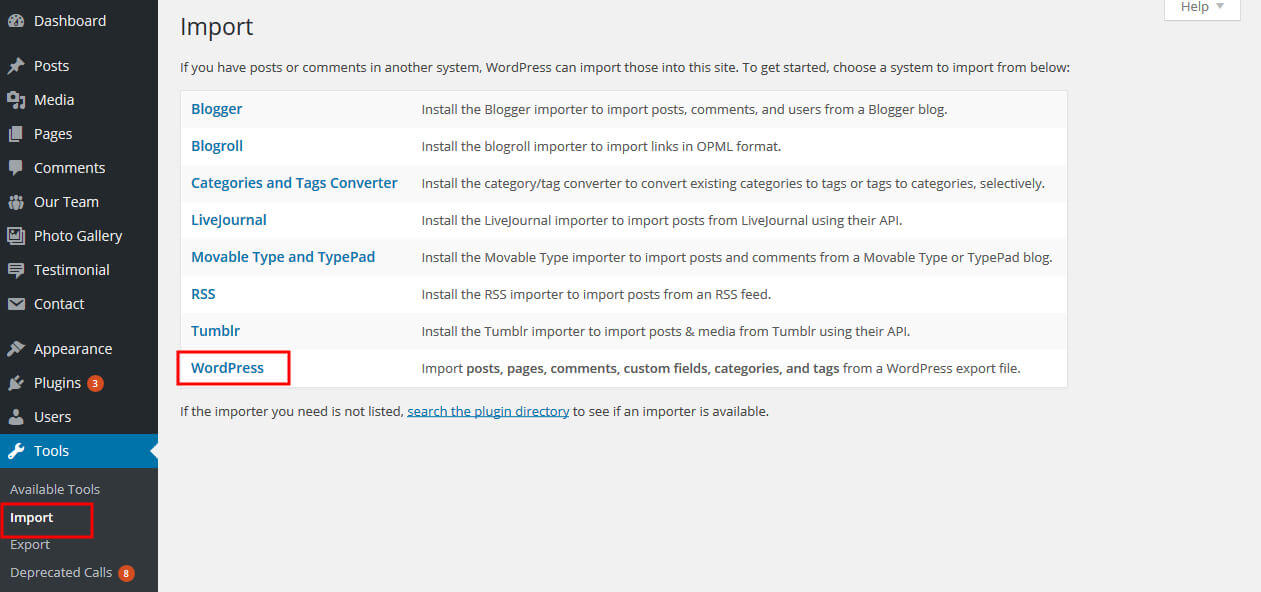
- Go to the tools Select import option and select wordpress and install then browse xml file and you'r done. See below screenshot.
How to set up homepage
Setup Header
Follow these instructions to setup header.
- For Site Name/Logo: For changing site name go to Settings >> General >> Site Title OR if you want to uplaod logo for your site go to Appearance >> Theme Options >> Basic settings >> Logo. Please see the theme option tab in this documentation for more details.
- For Header Info.: Go to Appearance >> Theme Options >> Basic Settings >> Header Information.
- For Navigation: See the Setup Navigation tab of this documentation.
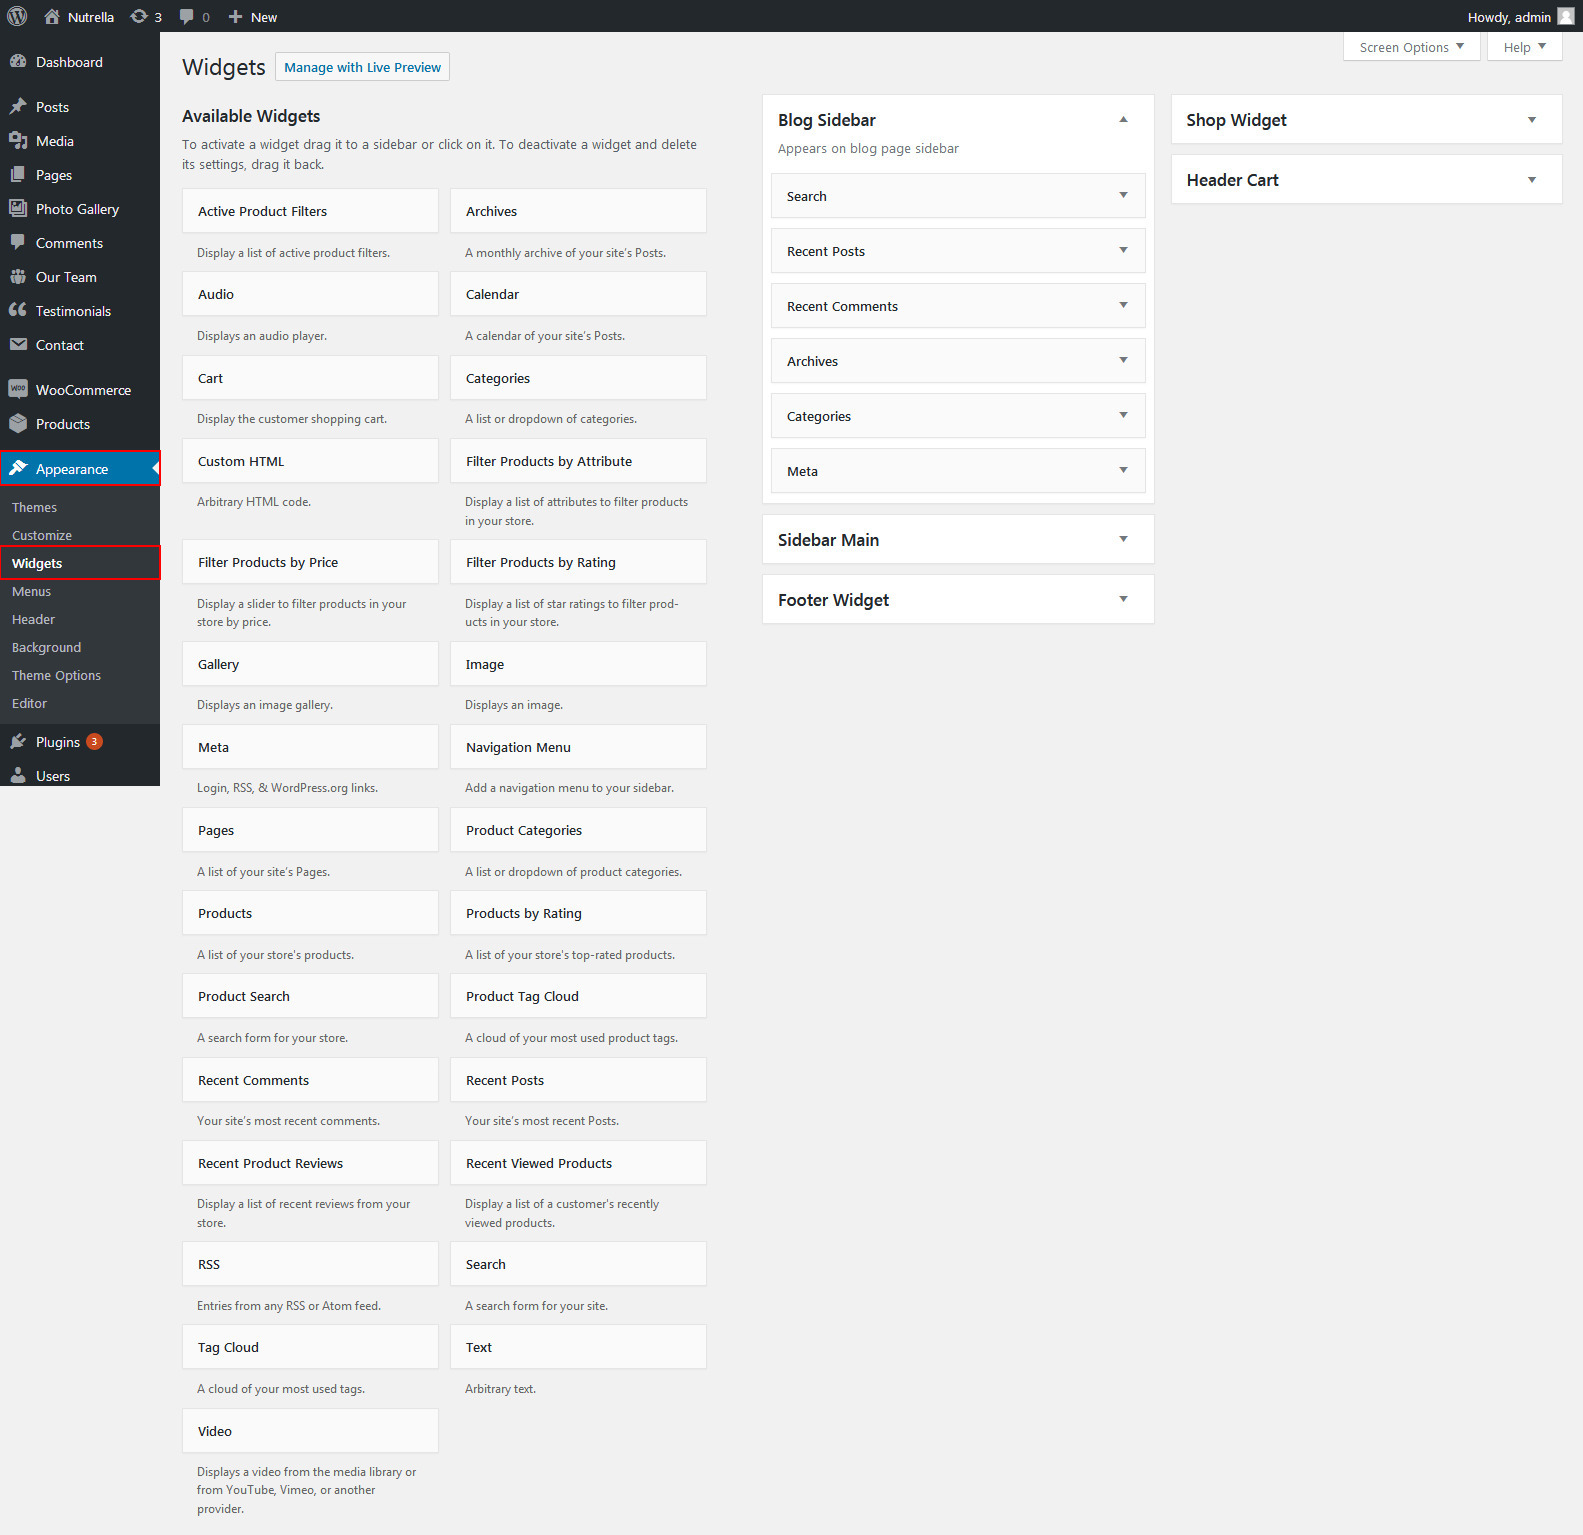
- For DropDown Cart: Go to Appearance >> Widgets >> Add cart widget to Header Cart Sidebar.
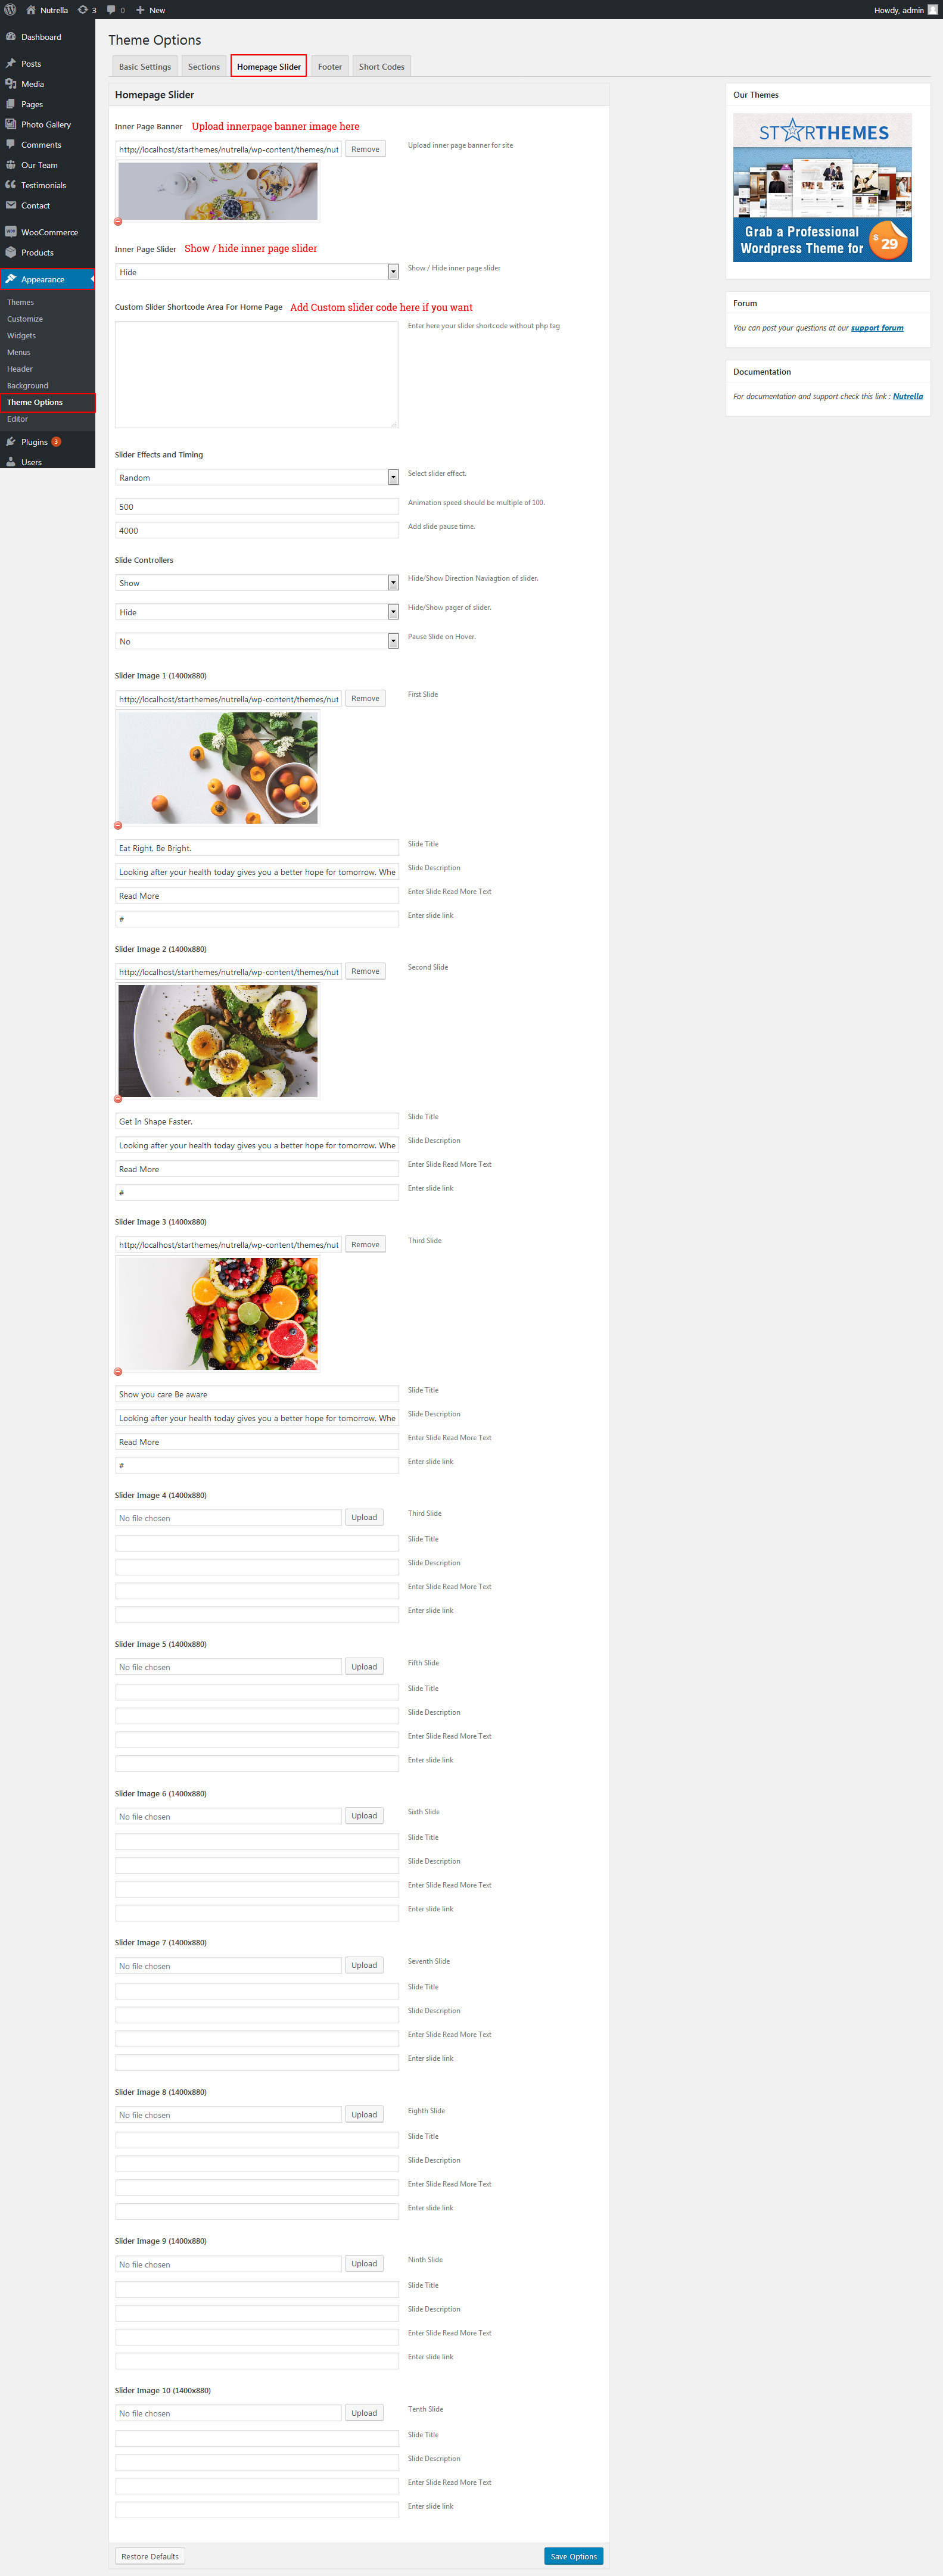
- For Slider: Go to Appearance >> Theme Options >> Homepage Slider >> Upload image, Add Title and Add Description.
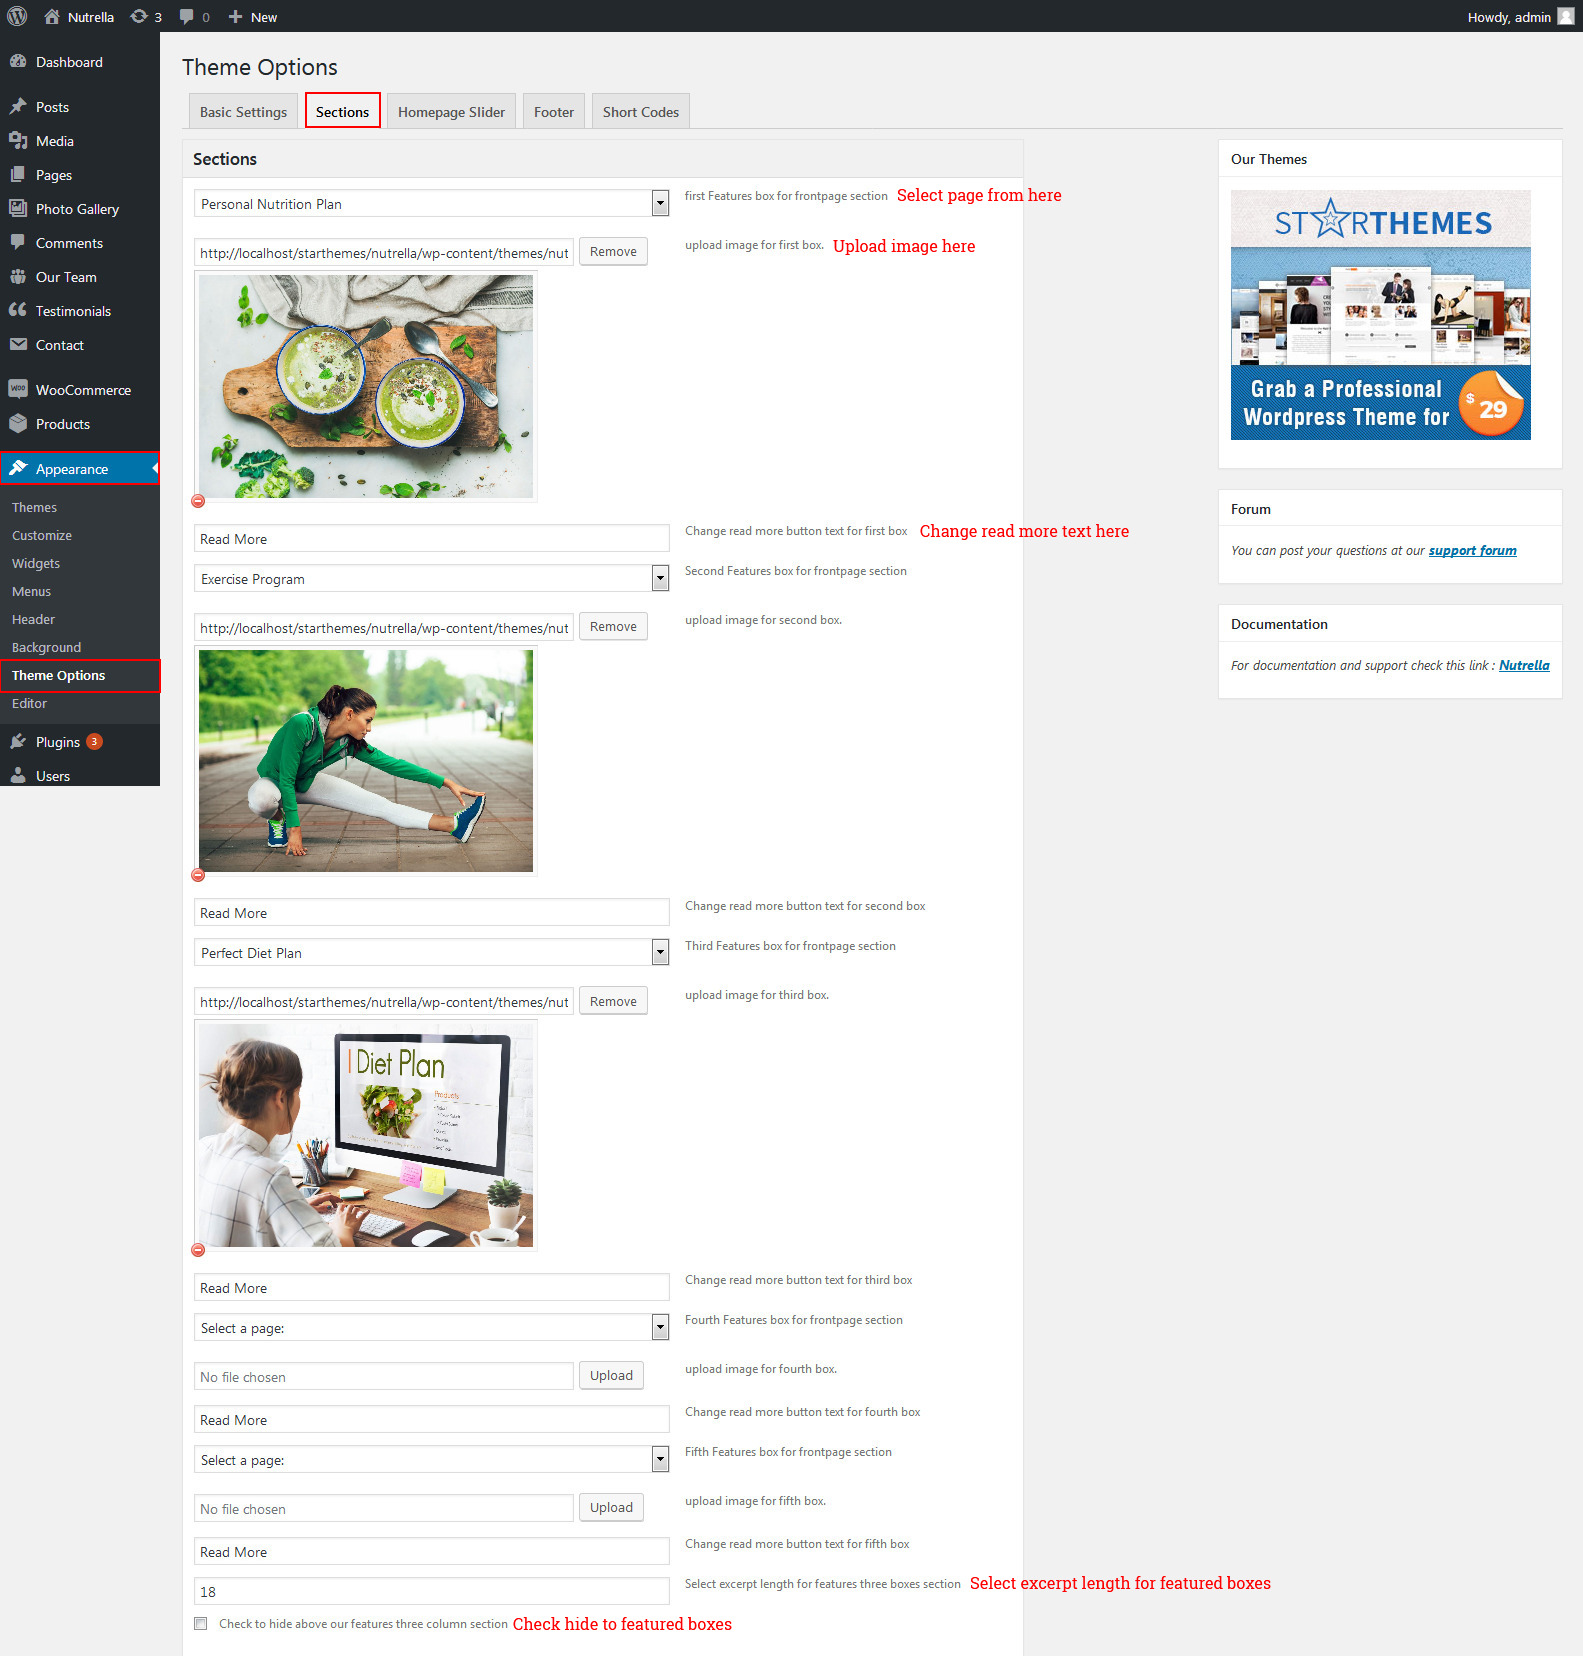
Featured Box Section
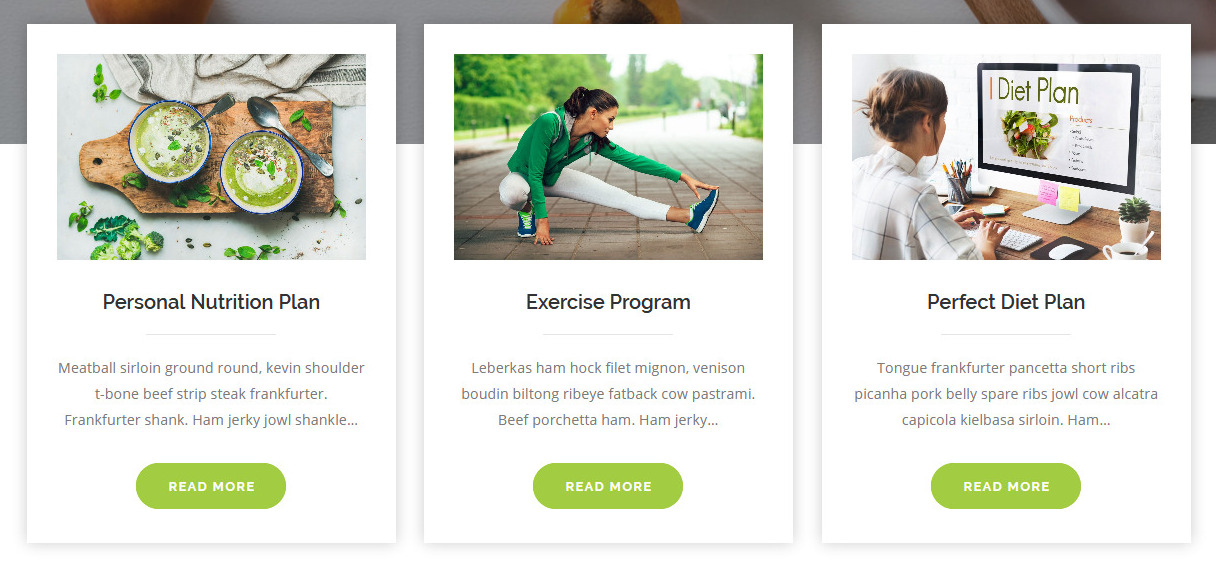
For setting up Featured Box section Go to >> Appearance >> Theme Options >> Sections.
Follow path to add featured boxes.
Welcome Section

For setting up Welcome section Go to >> Appearance >> Theme Options >> Sections >> Select Section 1.
Shortcode/Content for Welcome Section.
[column_content type="one_half"]<img src="Add Image path here...">[/column_content][column_content type="one_half_last" subcls="left-title"][section_title title="Hello, I am Joe Nick" sml_ttl="Your Personal Trainer"] I’ve helped people exactly like you - smart, ambitious, put together - figure out the one thing that eludes them: Their ideal weight. If you’re like lots of people I help, you don’t like how you look, avoid pictures like the plague, have a closet full of clothes you can’t wear, feel tired a lot, have tried working out, have tried cutting calories, have tried literally everything. <ol class="orlist"><li>150+ Private & Group Workout Sessions</li><li>1600+ Happy Customers After Diet</li><li>7 to 60 Days Nutrition Program</li></ol>[/column_content][clear]
Once you added above shortcode in the sections content area, you'r done. (Section 1.)
Counter Secton

For setting up Counter section Go to >> Appearance >> Theme Options >> Sections >> Select Section 2.
Shortcode/Content for Counter Section.
[counter count="48" title="Professional courses" plus="no" color="#ffffff"][counter count="124" title="Happy customers" plus="yes" color="#ffffff"][counter count="240" title="Working hours" plus="no" color="#ffffff"][counter count="38" title="Awards and features" plus="no" color="#ffffff"][counter count="100" title="Result" plus="yes" color="#ffffff"][clear]
Once you added above shortcode in the sections content area, you'r done. (Section 2.)
Perfect Body Section
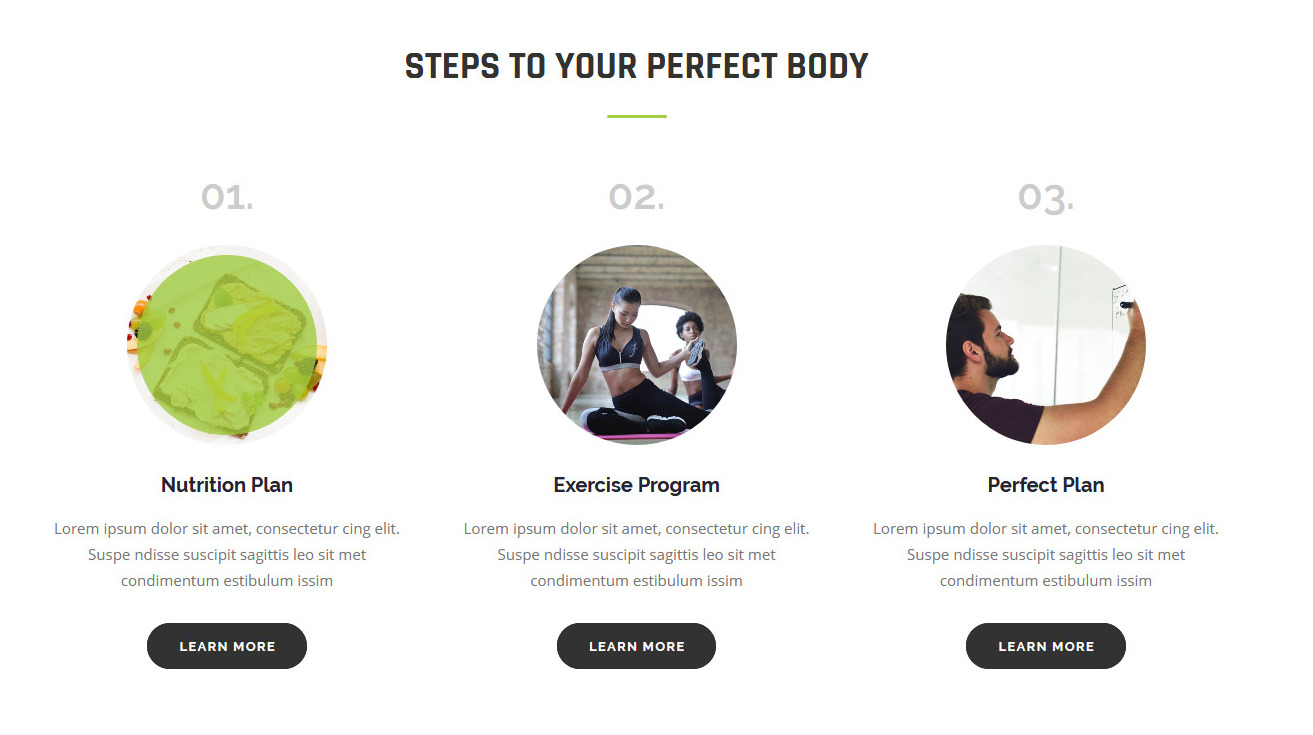
For setting up Perfect Body Section Go to >> Appearance >> Theme Options >> Sections >> Select Section 3.
Shortcode/Content for Perfect Body Section.
[column_content type="one_third"][infobox step="01." image="Add your image path here..." title="Nutrition Plan" link="#" readmore="Learn More"] Lorem ipsum dolor sit amet, consectetur cing elit. Suspe ndisse suscipit sagittis leo sit met condimentum estibulum issim [/infobox][/column_content][column_content type="one_third"][infobox step="02." image="Add your image path here..." title="Exercise Program" link="#" readmore="Learn More"] Lorem ipsum dolor sit amet, consectetur cing elit. Suspe ndisse suscipit sagittis leo sit met condimentum estibulum issim [/infobox][/column_content][column_content type="one_third_last"][infobox step="03." image="Add your image path here..." title="Perfect Plan" link="#" readmore="Learn More"] Lorem ipsum dolor sit amet, consectetur cing elit. Suspe ndisse suscipit sagittis leo sit met condimentum estibulum issim [/infobox][/column_content][clear]
Once you added above shortcode in the sections content area, you'r done. (Section 3.)
Testimonials Section
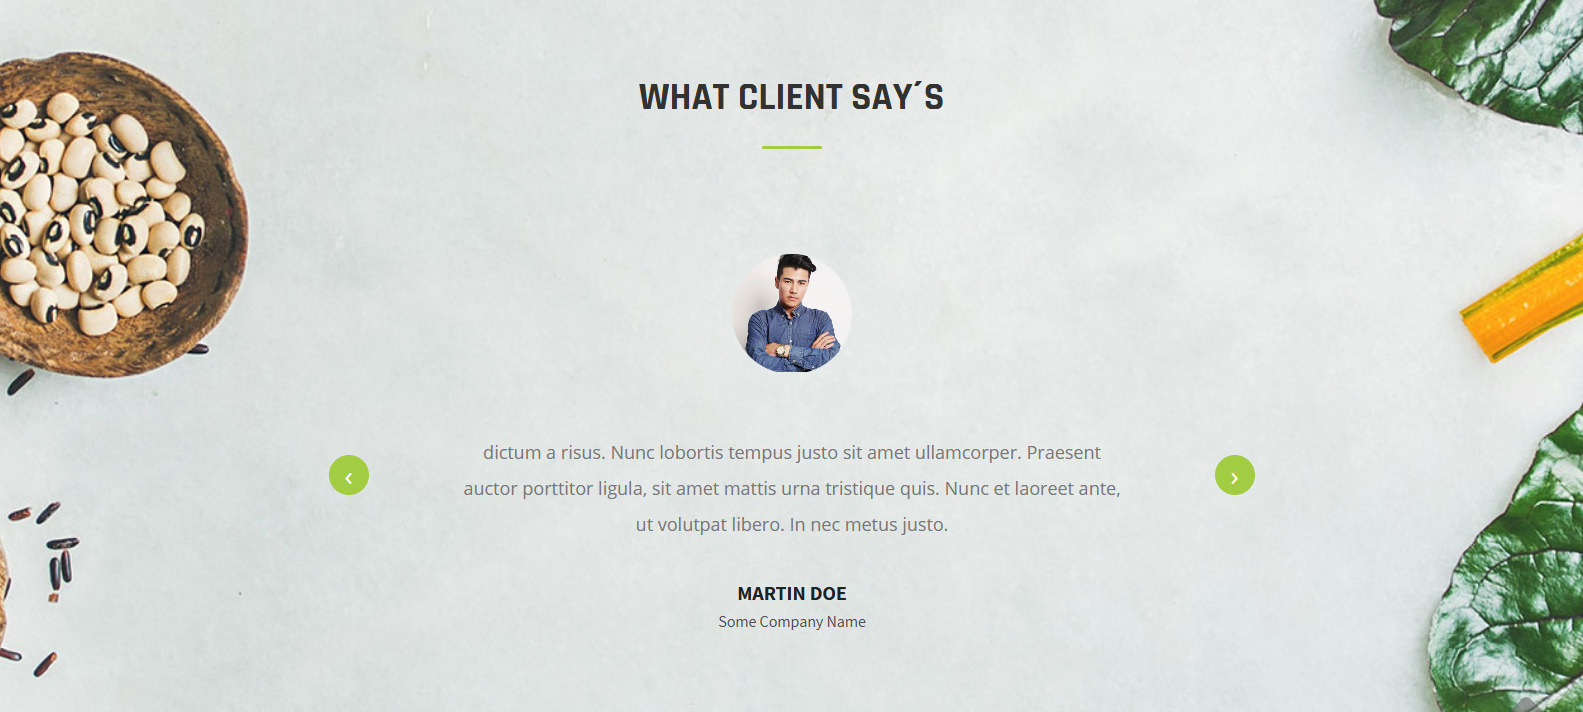
For setting up Testimonials section Go to >> Appearance >> Theme Options >> Sections >> Select Section 4.
For setting up Testimonials Section first of all you need to add some posts by using Testimonials Posts. Follow below instruction to add posts.
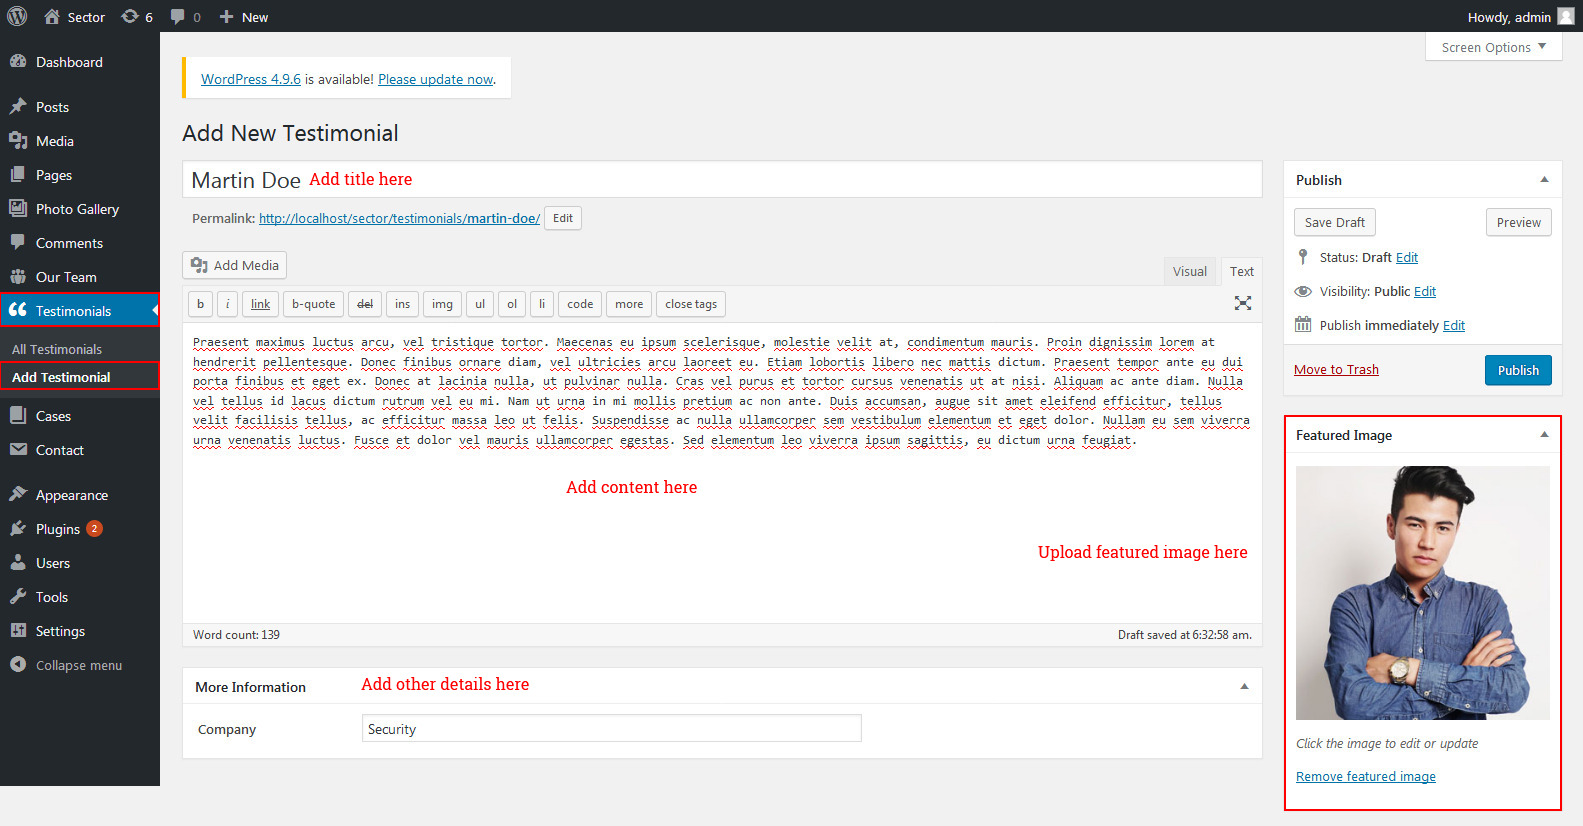
Once you added posts in the Testimoinials Posts type after that you just have to add post shortcode in the sections content area and you'r done. (Section 4.)
Testimonials Shortcode:
[testimonials show="3"]
How it Works Section
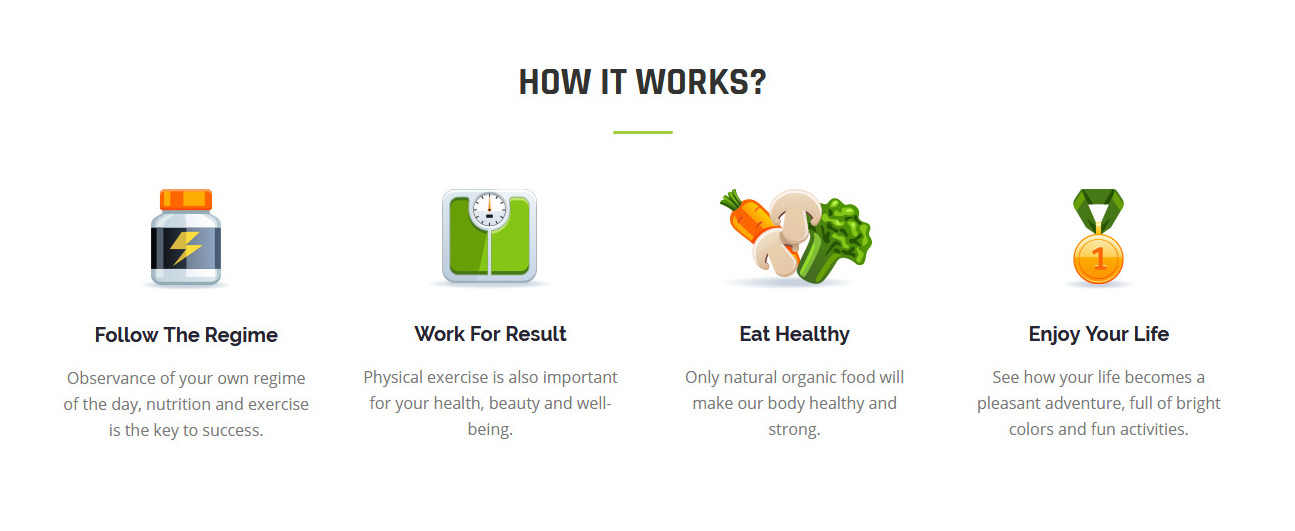
For setting up How it Works Section Go to >> Appearance >> Theme Options >> Sections >> Select Section 5.
Shortcode/Content for How it Works Section.
[column_content type="one_fourth"][iconbox image="Add your image path here..." title="Follow The Regime"] Observance of your own regime of the day, nutrition and exercise is the key to success. [/iconbox][/column_content][column_content type="one_fourth"][iconbox image="Add your image path here..." title="Work For Result"] Physical exercise is also important for your health, beauty and well-being. [/iconbox][/column_content][column_content type="one_fourth"][iconbox image="Add your image path here..." title="Eat Healthy"] Only natural organic food will make our body healthy and strong. [/iconbox][/column_content][column_content type="one_fourth_last"][iconbox image="Add your image path here..." title="Enjoy Your Life"] See how your life becomes a pleasant adventure, full of bright colors and fun activities. [/iconbox][/column_content][clear]
Once you added above shortcode in the sections content area, you'r done. (Section 5.)
Our Gallery Section

For setting up Our Gallery section Go to >> Appearance >> Theme Options >> Sections >> Select Section 6.
For setting up Our Gallery Section first of all you need to add some posts by using Photo Gallery Posts. Follow below instruction to add posts.
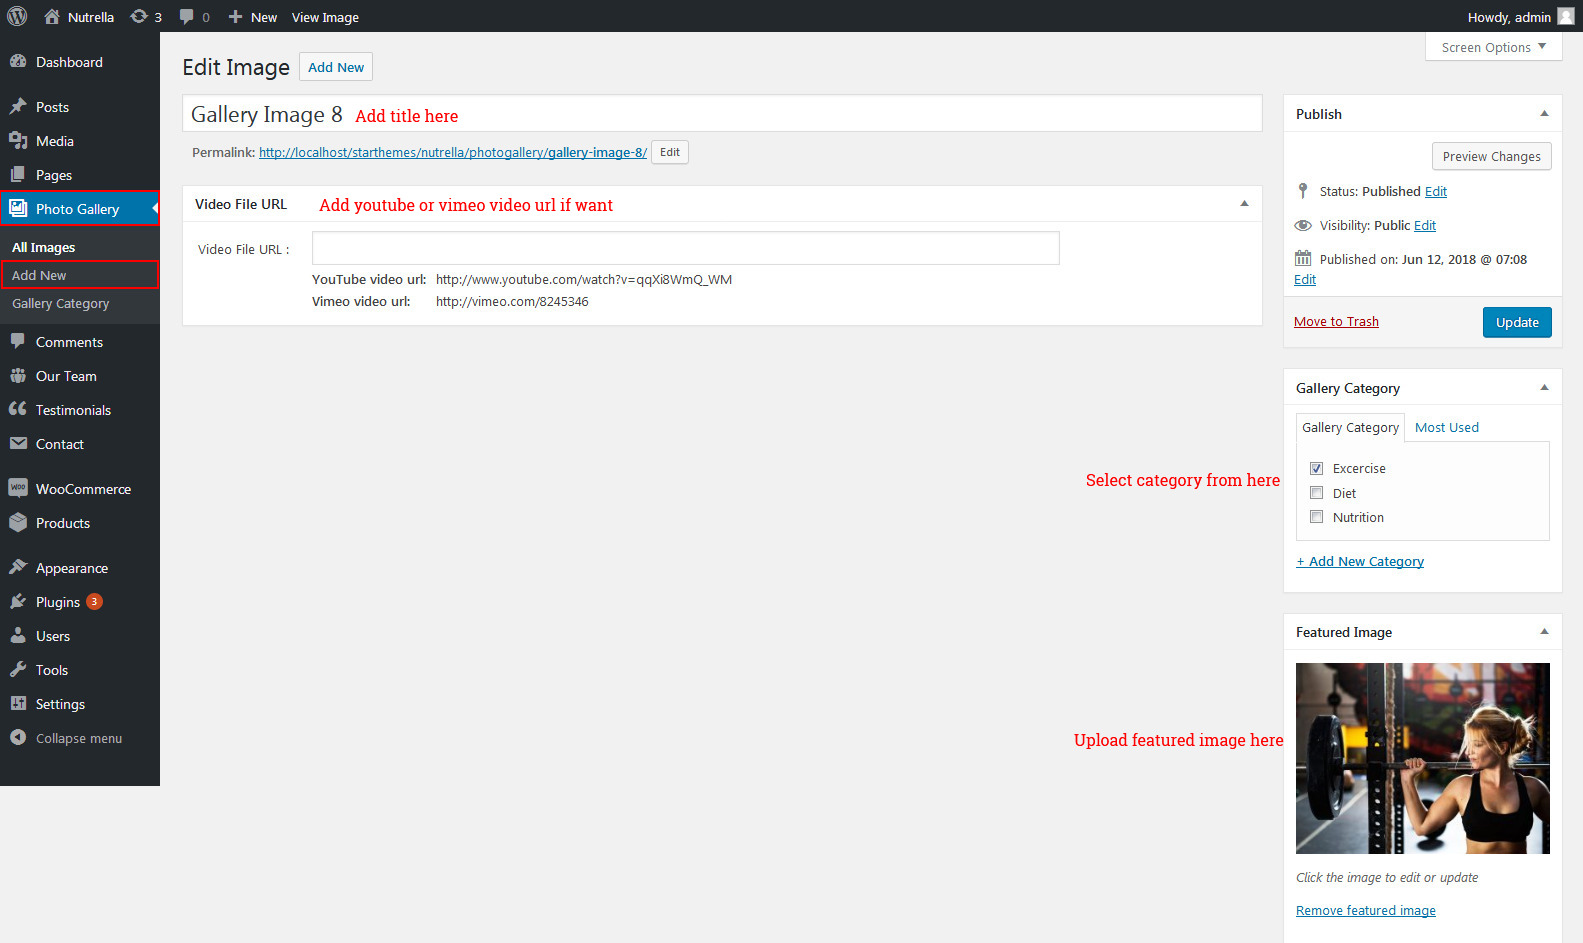
Once you added posts in the Photo Gallery Posts type after that you just have to add post shortcode in the sections content area and you'r done. (Section 6.)
Photo Gallery Shortcode:
[photogallery show="8" filter="true"]
Diet Plans Section
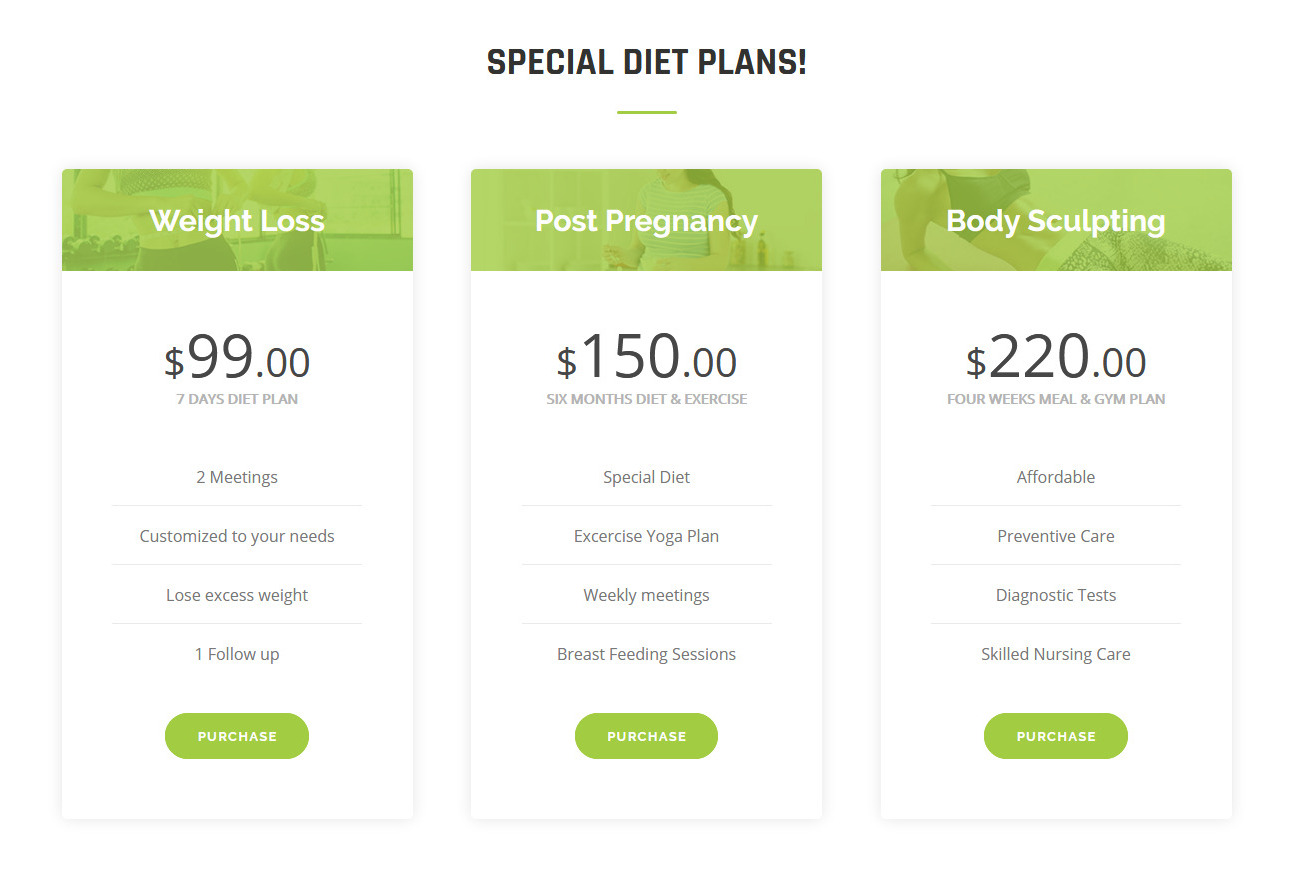
For setting up Diet Plans Section Go to >> Appearance >> Theme Options >> Sections >> Select Section 7.
Shortcode/Content for Diet Plans Section.
[column_content type="one_third"][package image="Add image path here" title="Weight Loss" price="99" duration="7 Days Diet Plan" row1="2 Meetings" row2="Customized to your needs" row3="Lose excess weight" row4="1 Follow up" btn_label="Purchase" link="#"][/column_content][column_content type="one_third"][package image="Add image path here" title="Post Pregnancy" price="150" duration="SIX MONTHS DIET & EXERCISE" row1="Special Diet" row2="Excercise Yoga Plan" row3="Weekly meetings" row4="Breast Feeding Sessions" btn_label="Purchase" link="#"][/column_content][column_content type="one_third_last"][package image="Add image path here" title="Body Sculpting" price="220" duration="FOUR WEEKS MEAL & gym PLAN" row1="Affordable" row2="Preventive Care" row3="Diagnostic Tests" row4="Skilled Nursing Care" btn_label="Purchase" link="#"][/column_content][clear]
Once you added above shortcode in the sections content area, you'r done. (Section 7.)
Our Products Section
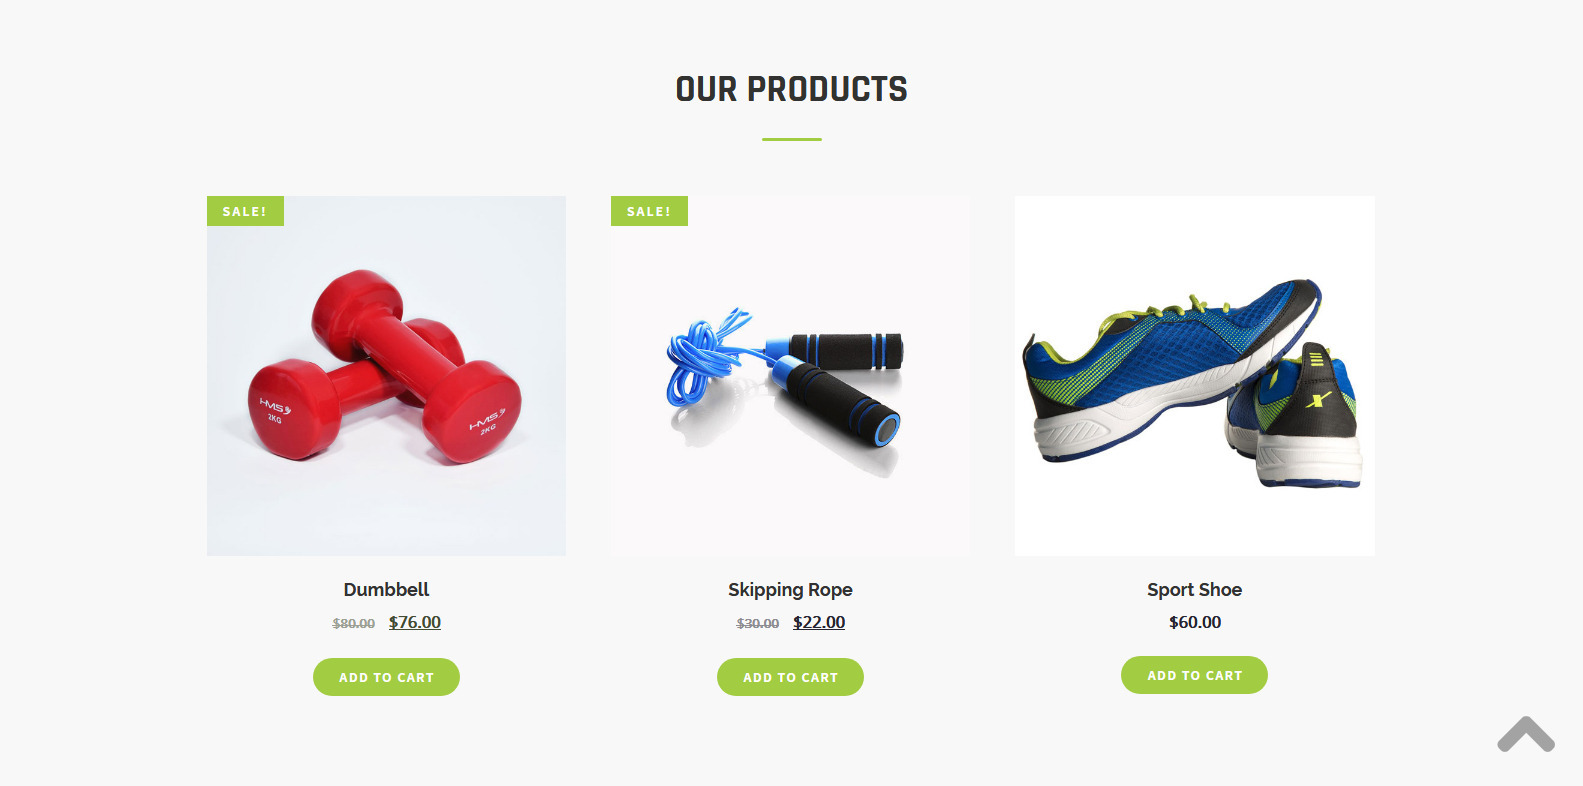
For setting up Our Products Section Go to >> Appearance >> Theme Options >> Sections >> Select Section 8.
Shortcode/Content for Our Products Section.
[products limit="3"]
Once you added above shortcode in the sections content area, you'r done. (Section 8.)
Our Trainers Section
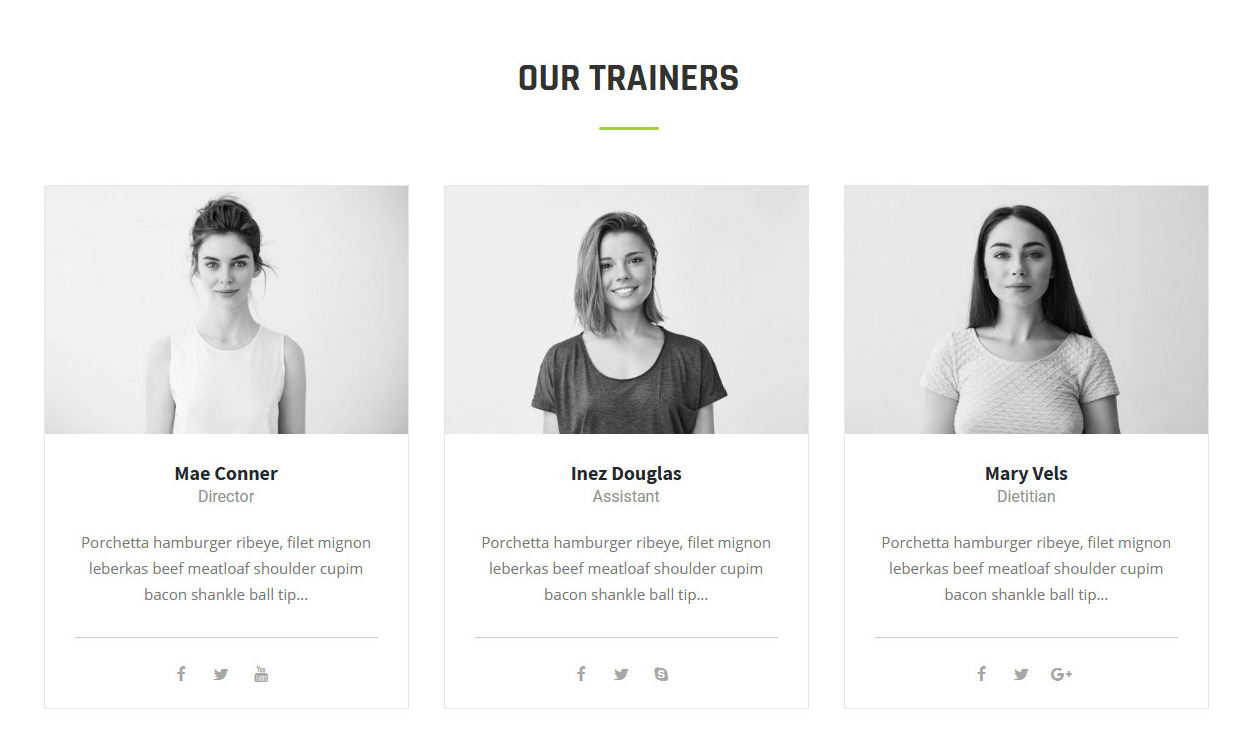
For setting up Our Trainers Section section Go to >> Appearance >> Theme Options >> Sections >> Select Section 9.
For setting up Our Trainers page first of all you need to add some posts by using Our Team Posts. Follow below instruction to add posts.
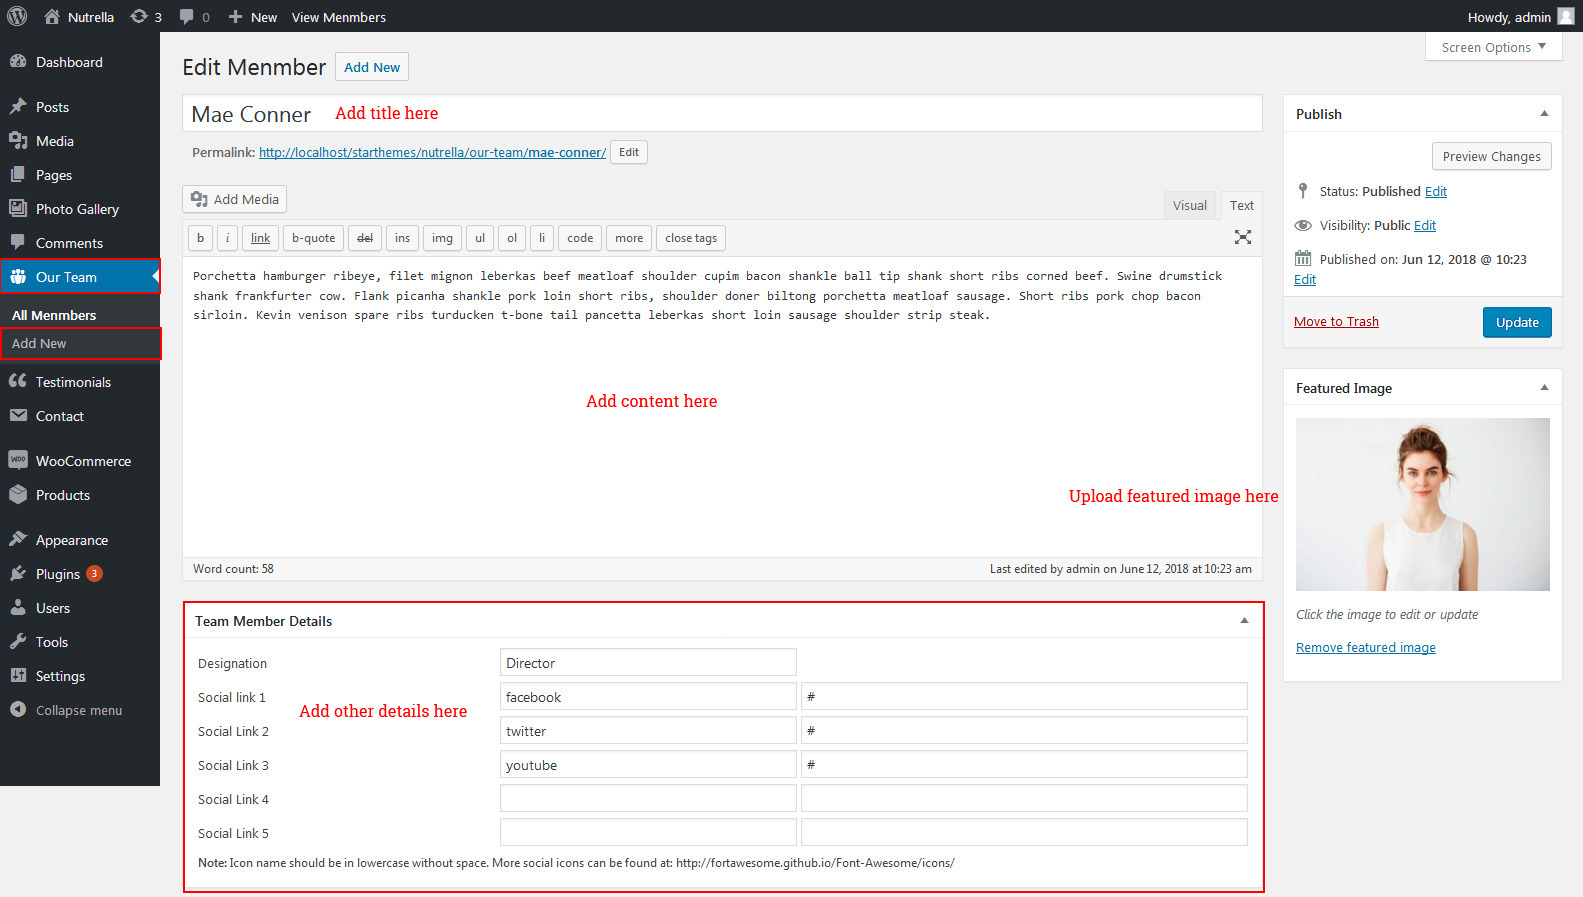
Once you added posts in the Our team Posts type after that you just have to add post shortcode in the sections content area and you'r done. (Section 9.)
Our Trainers Shortcode:
[our-team show="3"]
Once you added above shortcode in the sections content area, you'r done. (Section 9.)
Appointment Section
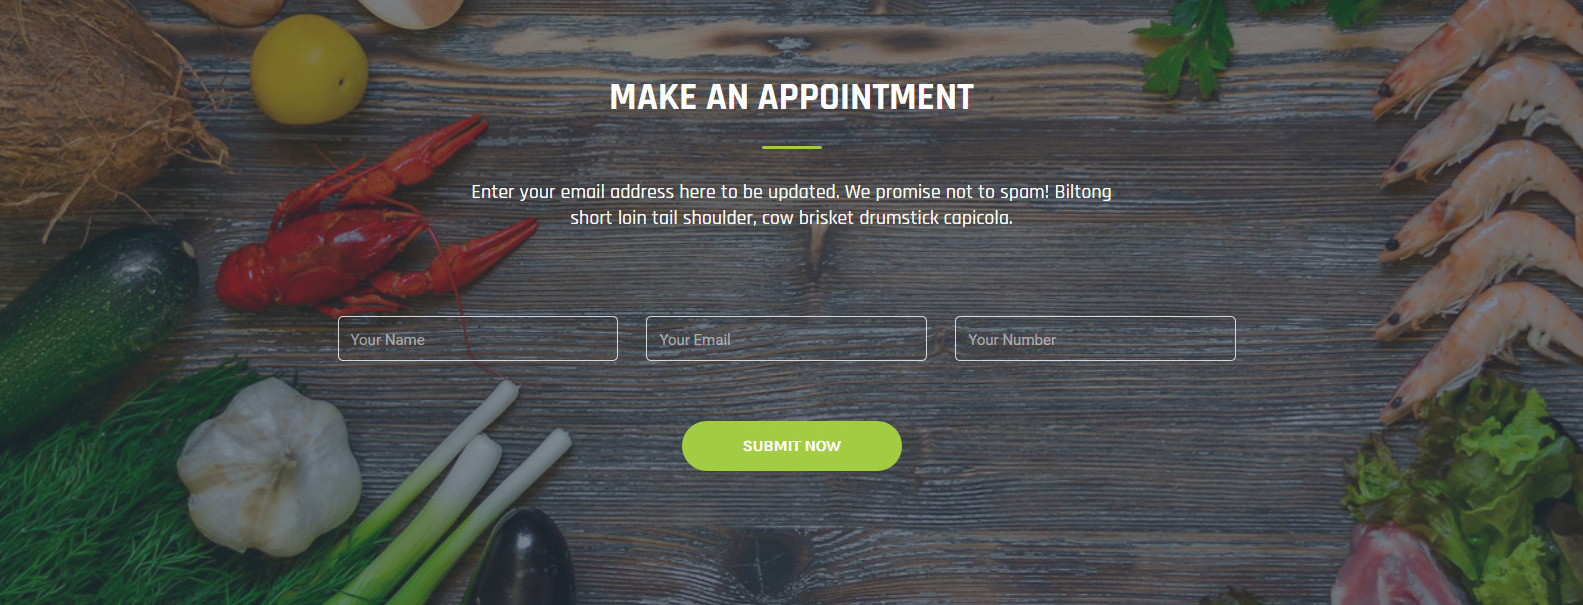
For setting up Appointment Section Go to >> Appearance >> Theme Options >> Sections >> Select Section 10.
Add contact form 7 Shortcode here:
See plugin tab to get code
Once you added above shortcode in the sections content area, you'r done. (Section 10.)
Latest News Section Section
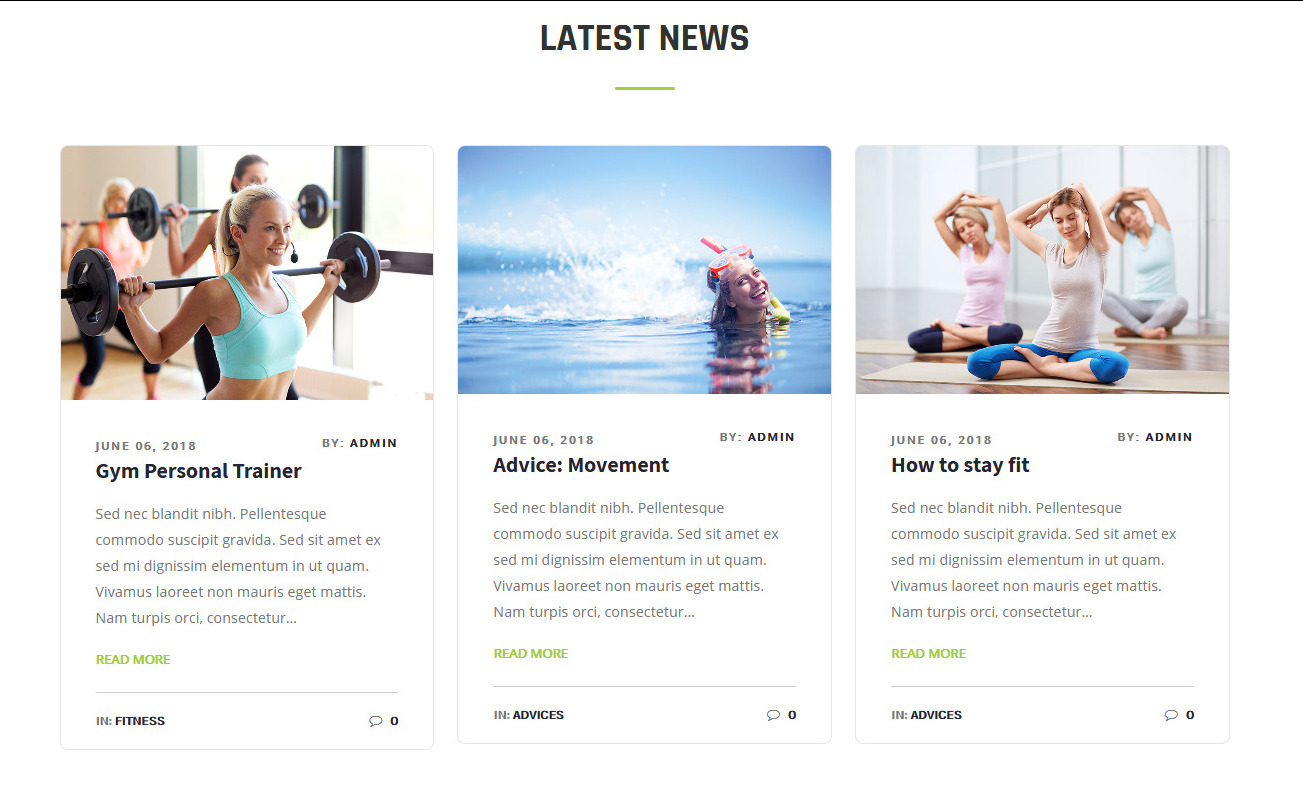
For setting up Latest News Section section Go to >> Appearance >> Theme Options >> Sections >> Select Section 11.
For setting up Latest News page first of all you need to add some posts by using Posts. Follow below instruction to add posts.
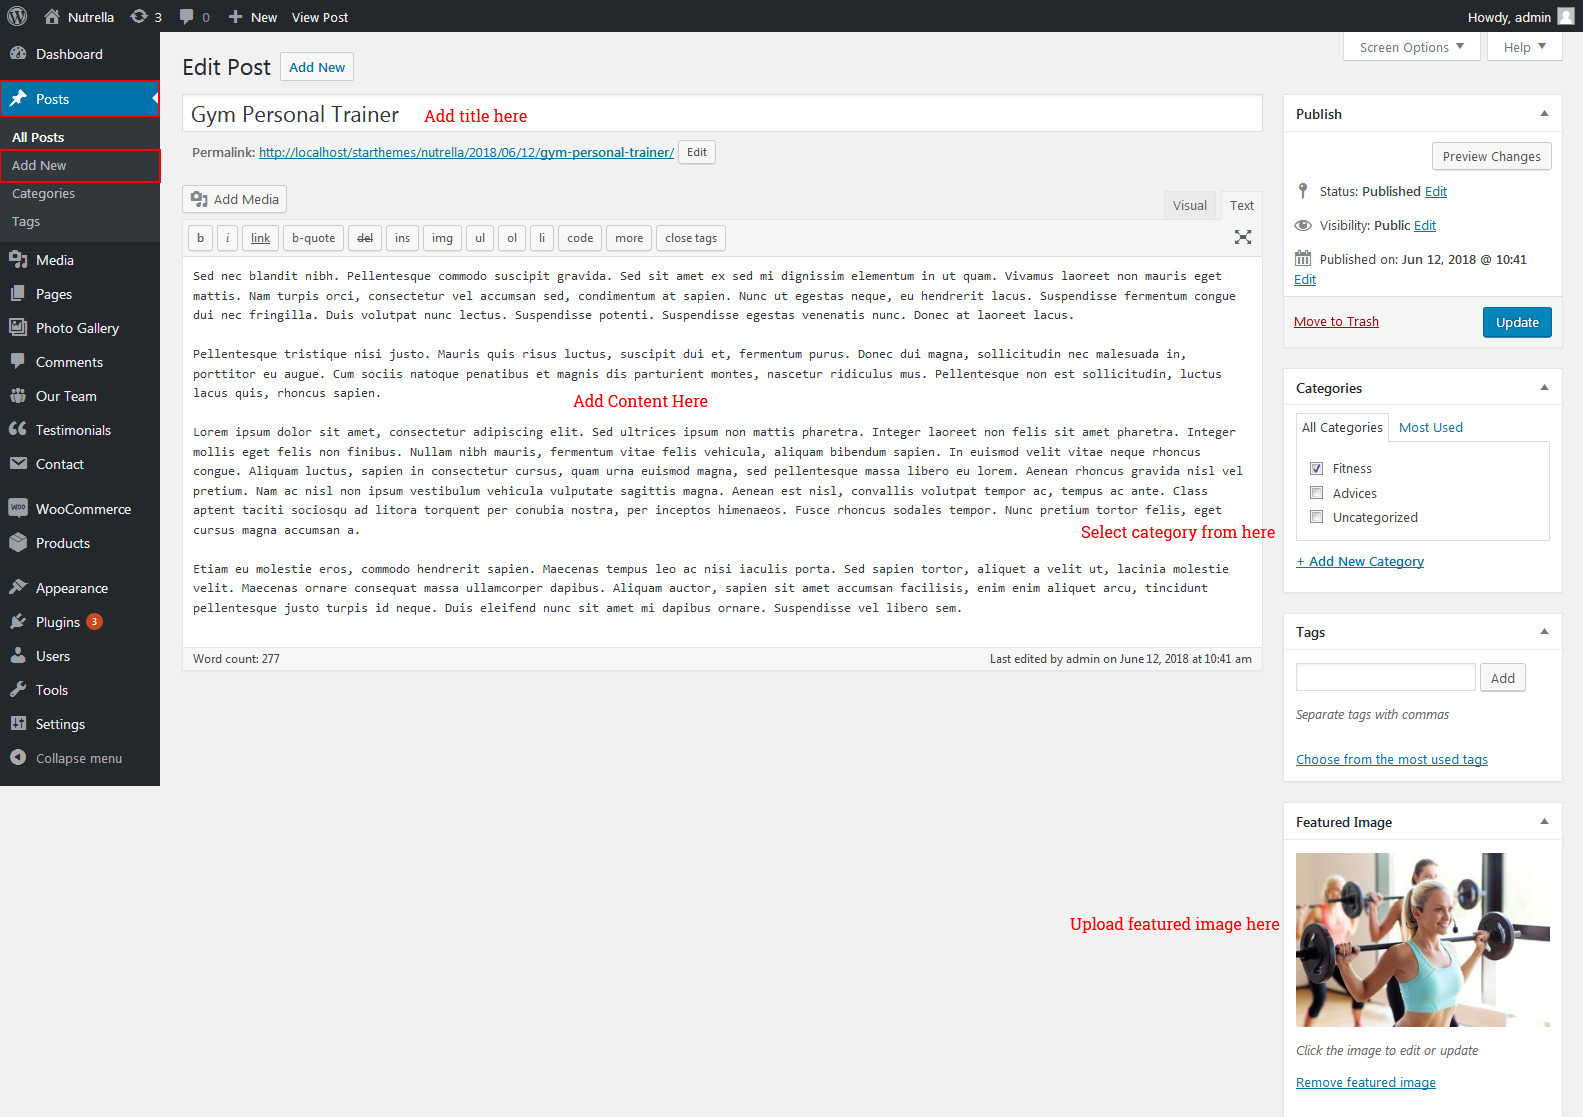
Once you added posts in the Posts type after that you just have to add post shortcode in the sections content area and you'r done. (Section 11.)
Latest News Section Shortcode:
[latest-news showposts="3" date="show" category="show" comment="show" author="show"]
Instagram Section

For setting up Instagram Section Go to >> Appearance >> Theme Options >> Sections >> Select Section 12.
Shortcode/Content for Instagram Section.
[instagram][clear]
Once you added above shortcode in the sections content area, you'r done. (Section 12.)
You can easily find your instagram ID and instagram Access token from below links.
Find User ID Instagram User ID
Find Access Token Instagram Access Token
Setup Footer

Go to Appearance >> Theme Options >> Footer.
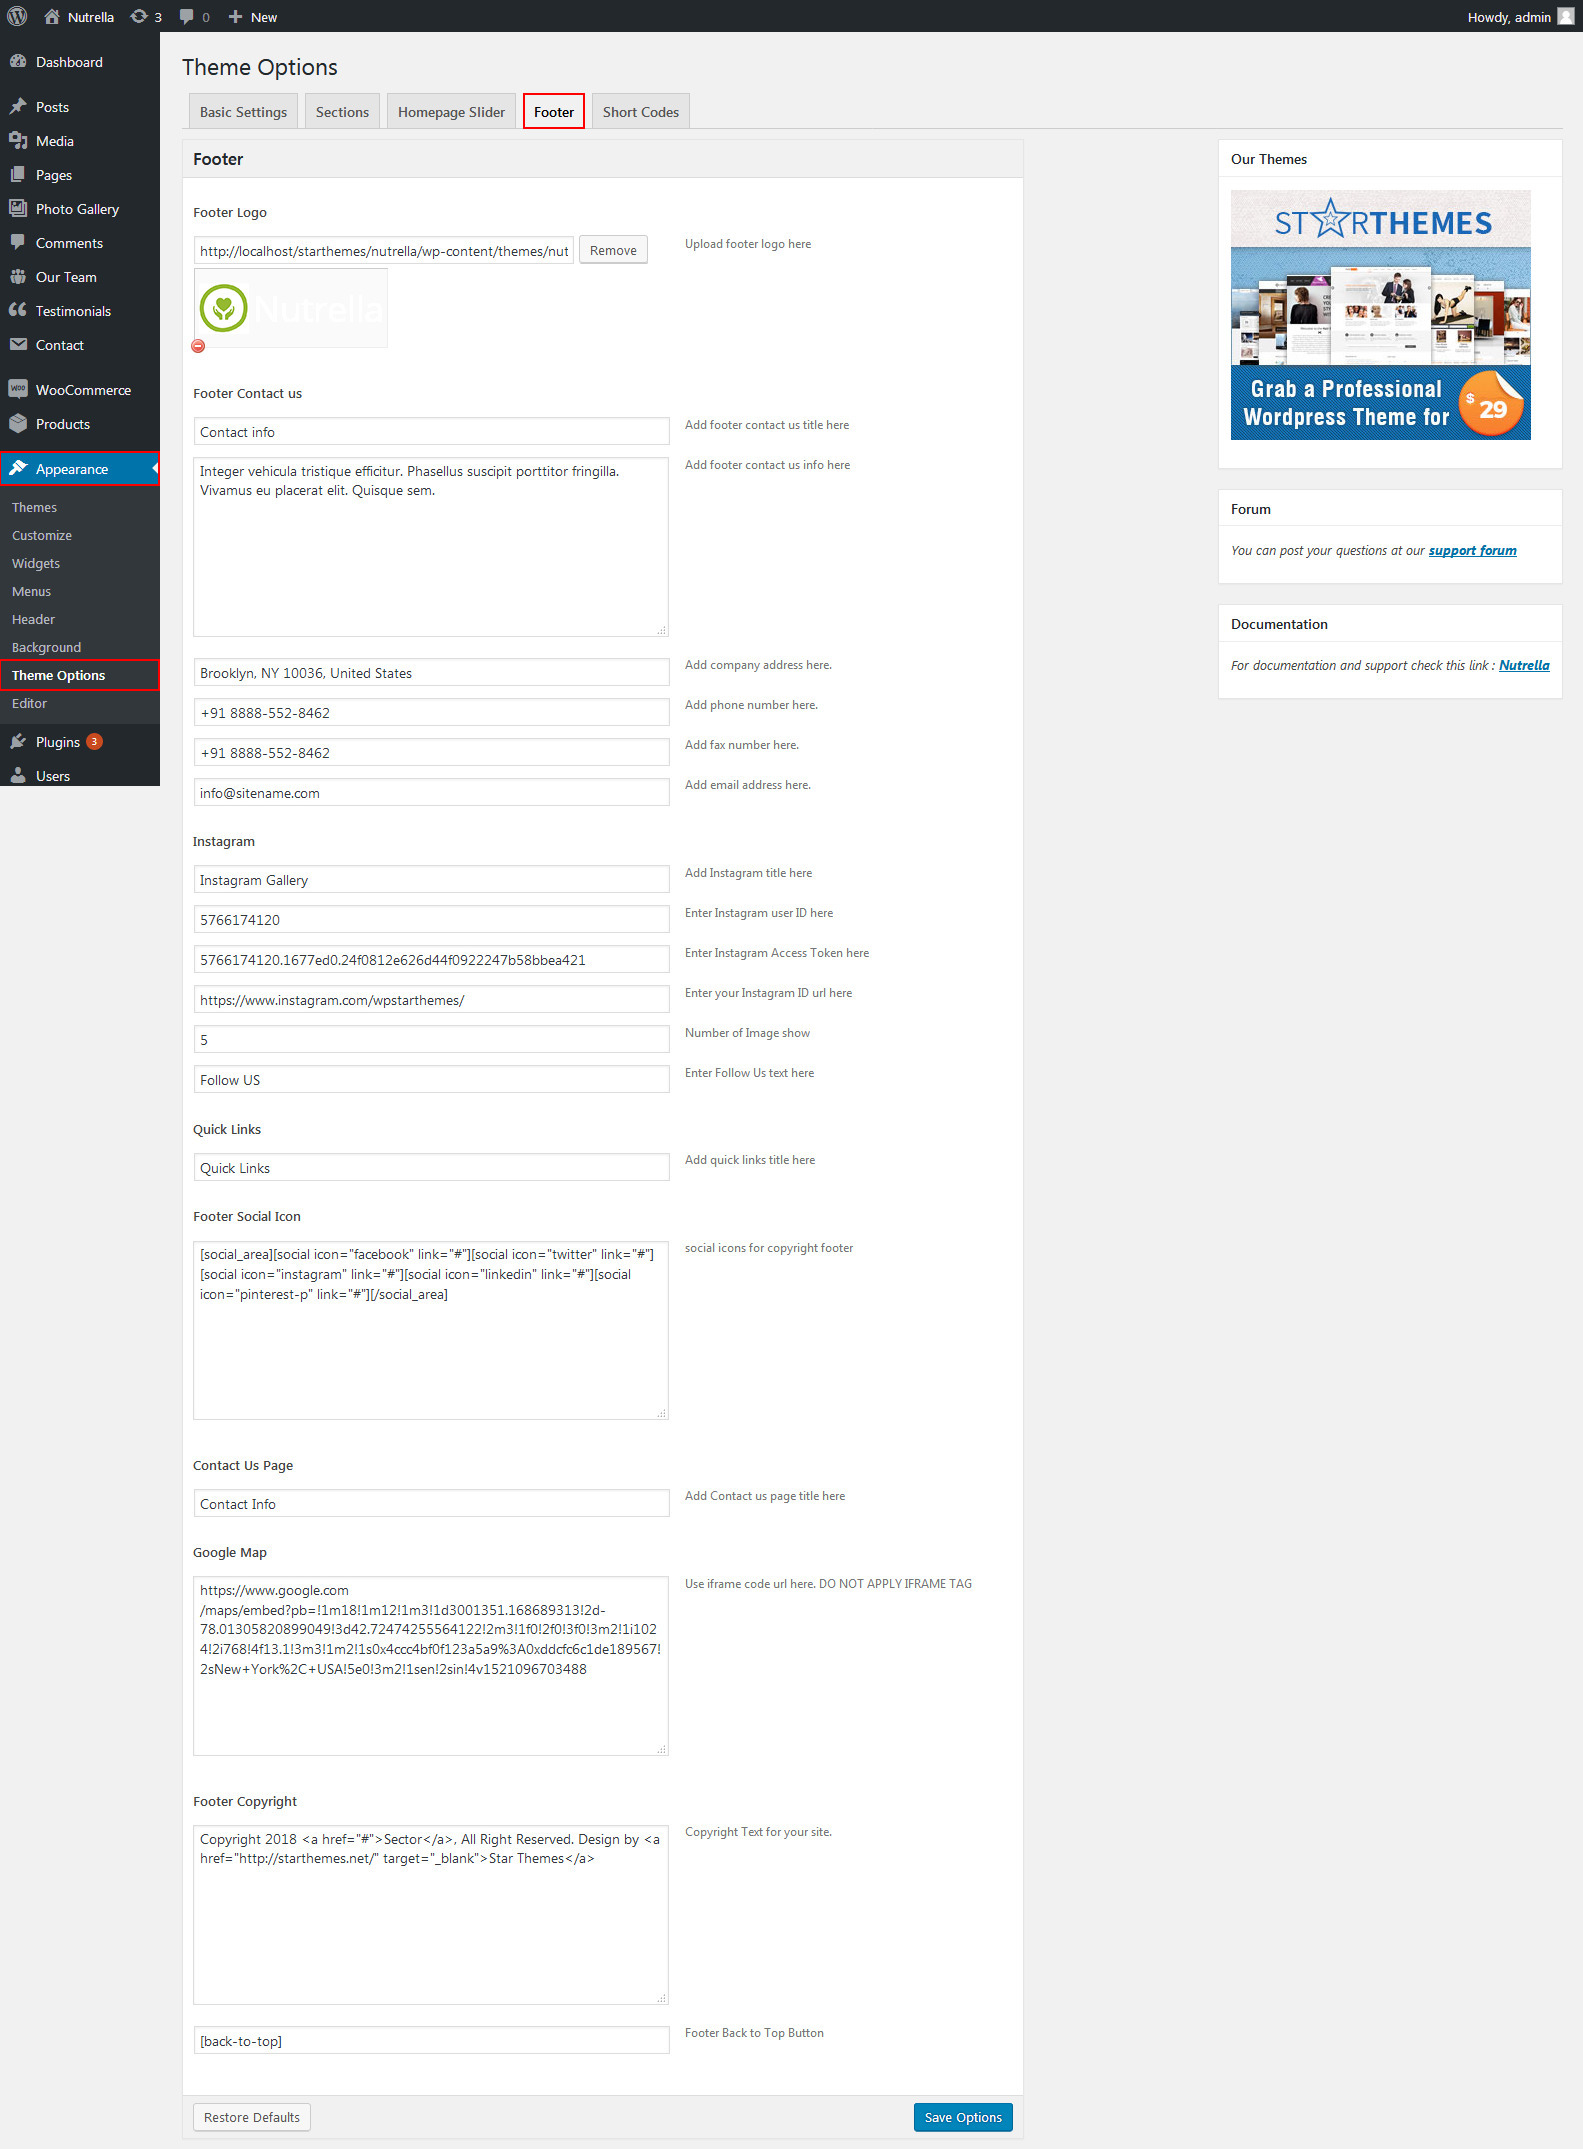
- For footer three boxes: Go to Appearance >> Theme Options >> Footer >> Add Your details.
- For footer Logo: Go to Appearance >> Theme Options >> Footer >> footer logo.
- For footer Menu: Go to Appearance >> Theme Options >> Footer >> Footer Quick Links title and see Navigation tab to add menu.
- For footer social icon: Go to Appearance >> Theme Options >> Footer >> Footer Social Icon.
- For footer copyright text: Go to Appearance >> Theme Options >> Footer >> Footer Copyright.
Shortcode for Social Icon.
[social_area][social icon="twitter" link="#"][social icon="facebook" link="#"][social icon="google-plus" link="#"][social icon="linkedin" link="#"][social icon="pinterest-p" link="#"][/social_area]
Take all the icons name from Font Awesome
Setup Navigation
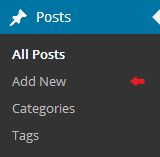
- First of all create pages from go to Pages >> Add new page.
- Go to Appearance >> Menu
- Click on Create a new menu link
- Give a name to your menu in Menu name and click save menu button
- Once you have create menu. You need to add pages by selecting with checkboxes. After adding menu list you can arrange it by drag and drop.
- Select menu theme location from the below checkboxes
See this screenshot for better understanding.

Page Templates and Sidebars
Page Templates
- Default Template (the default page template with a right sidebar position)
- Full Width Page (a page template with one column without a sidebar)
- Left Sidebar (a page template with left sidebar position)
- No Sidebar (a page template have space on left and right.)
- Blog (Full Width) (a blog templates with one column without sidebar)
- Blog (Left Sidebar) (a blog templates with left sidebar position)
- Blog (Right Sidebar) (a blog template with right sidebar position)
- Blog (No Sidebar) (a blog template with no sidebar position)
- Contact (Full Width) (a contact template with add google map position)
Posts, Categories and Post Formats
Adding category
Review the following article for more information on adding categories: http://codex.wordpress.org/Manage_Categories_SubPanel
- Log into your WordPress Administration Panel (Dashboard).
- Click the Posts tab.
- With that done, click Categories for blog posts.
- Type in the name of your new category.
- After that, click the Add New Category button.
Creating a Blog post
- Log into your WordPress Administration Panel (Dashboard).
- Click the Posts tab.
- Click the Add New tab.
- Type in your post content. For more information on adding posts, please check the following link http://codex.wordpress.org/Posts_Add_New_SubPanel.
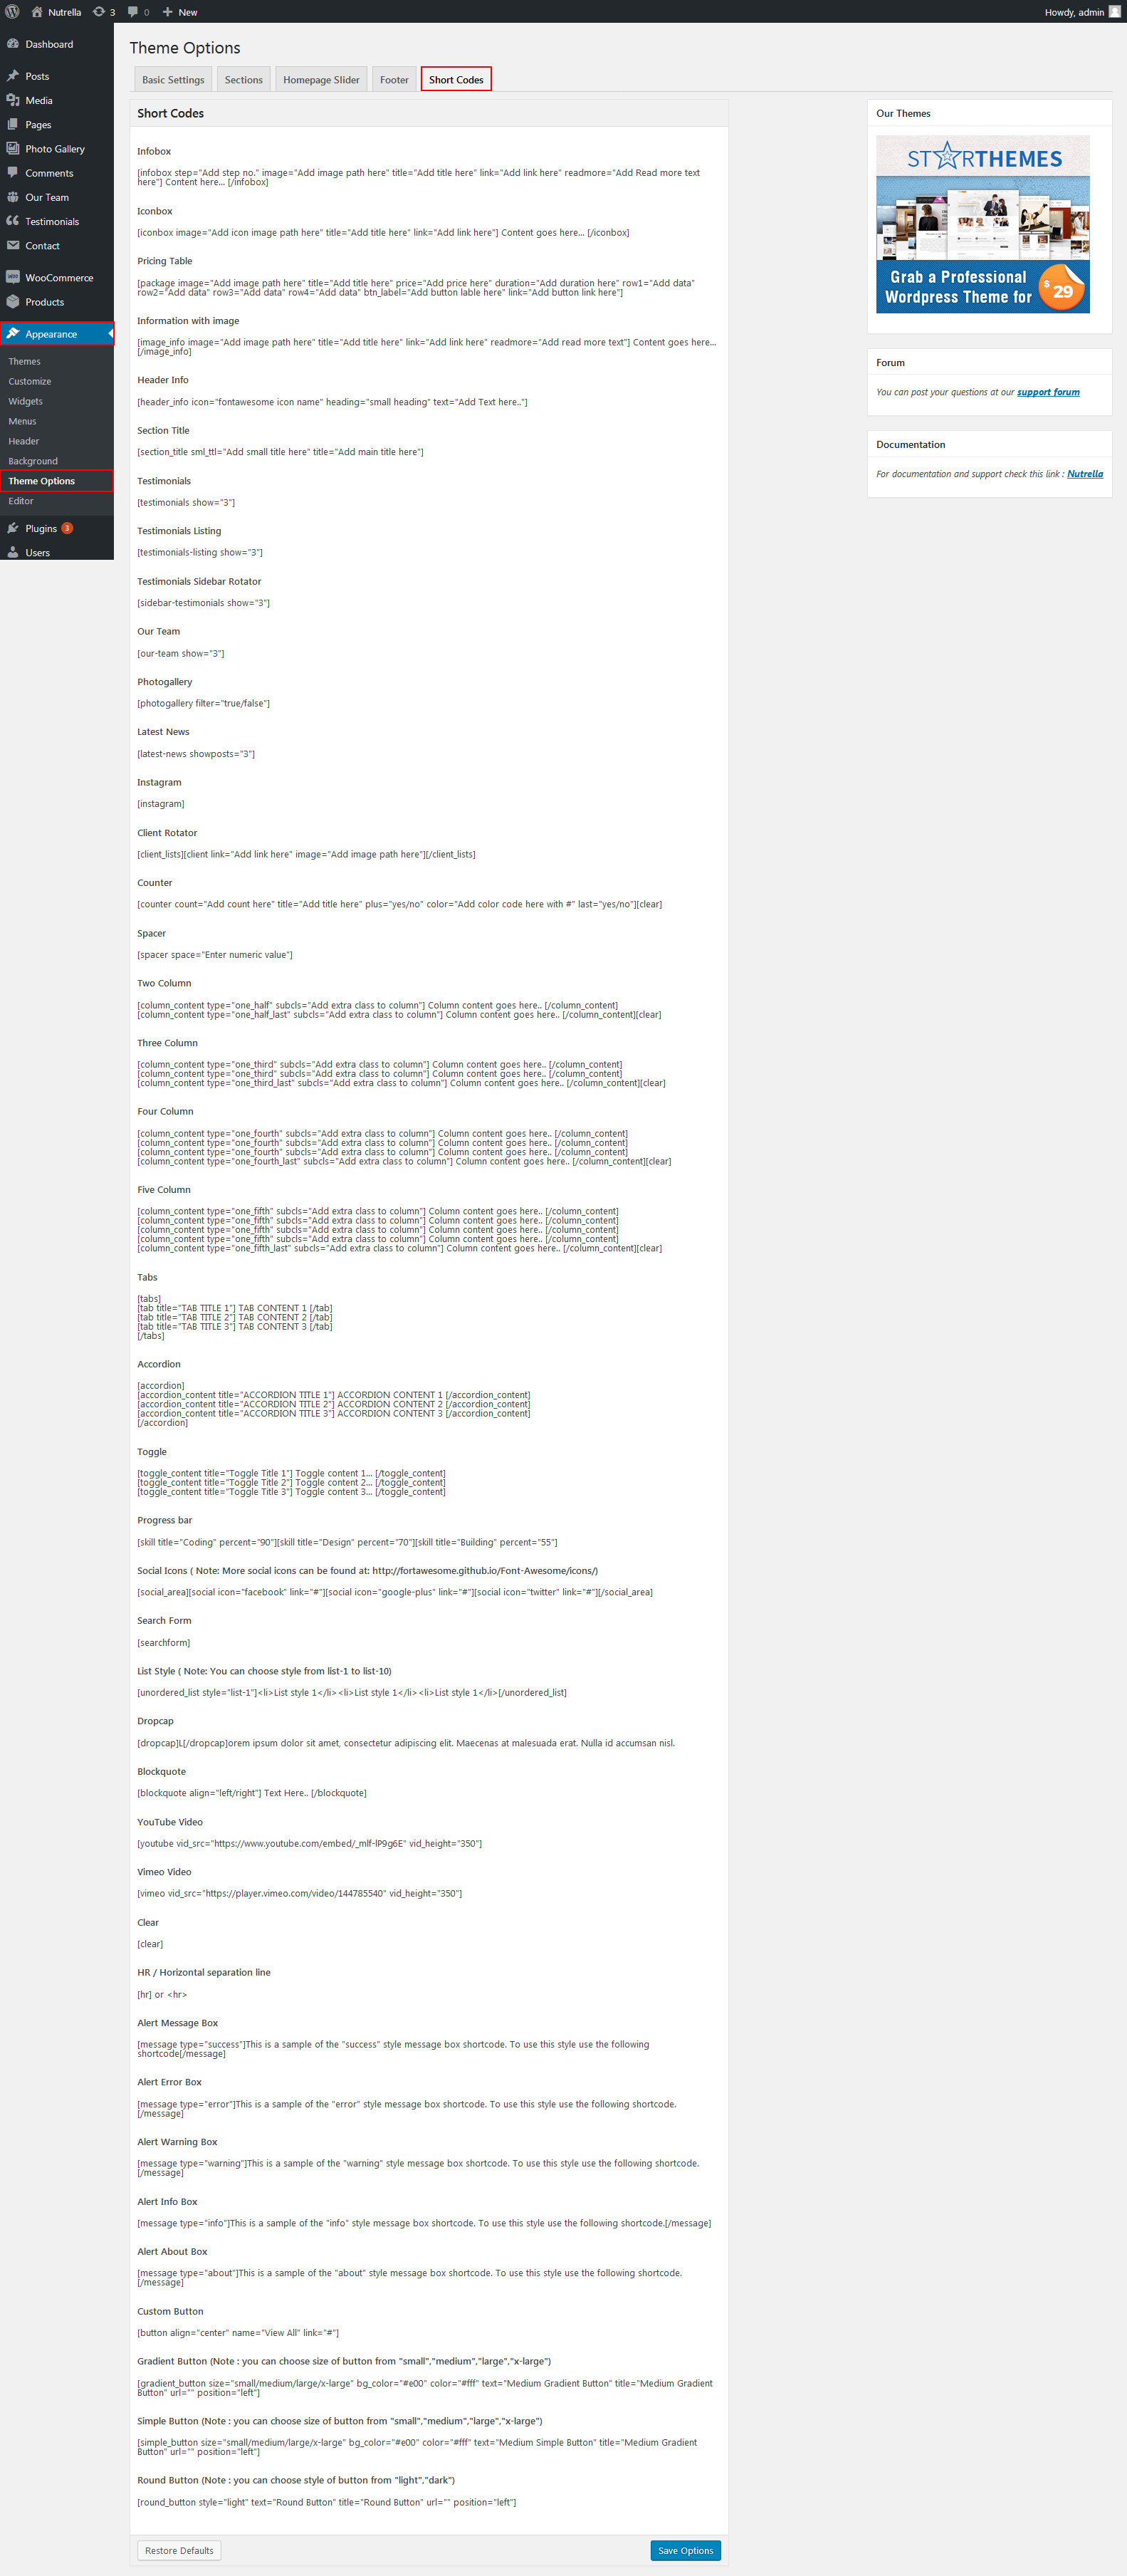
Shortcodes
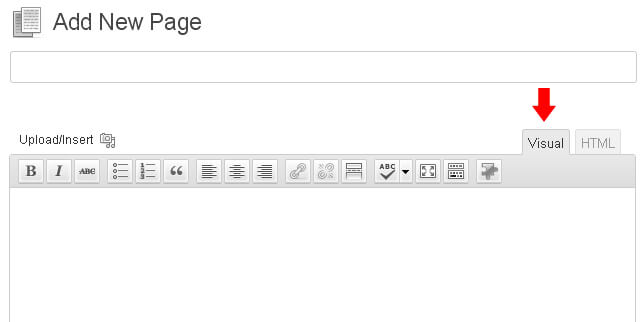
A shortcode is a powerful content building tool http://codex.wordpress.org/Shortcode. Shortcodes are easy to use. First of all, make sure that the editing mode is set to Visual.
All available shortcodes are conditionally divided into these groups:
- Social icon - used for social icon output.
- One half, one third, one fourth, one fifth - used for display content on columns.
- Tabs - used for display tabs.
- Toggle content - used for display toggle.
- Accordion content - used for display accordion.
- Gradient Button - used for small, medium, large, xtra large gradient button.
- Simple Button - used for small, medium, large, xtra large simple button.
- Round Button - used for light, dark round button.
- Message Boxes - used for success, error, warning, info, about message boxes.
- Search - used to display search form.
- List style - used to display lists.
- Blogpost - used to display blog post.
Elements
One half
[column_content type="one_half"]Column 1 Content goes here...[/column_content]
[column_content type="one_half_last"]Column 1 Content goes here...[/column_content]
Description: used to display column content. You can also use type="one_third OR one_fourth OR one_fifth" make sure to add _last for the last column.
Tabs
[tabs]
[tab title="TAB TITLE 1"]Tab Content goes here...[/tab]
[/tabs]
Description: use to display tab content.
Toggle content
[toggle_content title="Toggle Title 1"]Toggle Content goes here...[/toggle_content]
Description: use to display toggle content.
Accordion Content
[accordion]
[accordion_content title="ACCORDION TITLE 1"]Accordion Content goes here...[/accordion_content]
[/accordion]
Description: use to display accordion content.
Gradient Button
[gradient_button size="small" bg_color="#000000" color="#ffffff" text="text here" title="title here" url="#" position="left"]
Description: use to display gradient button. you can use small, medium, large, xtra lareg sizes.
Simple Button
[simple_button size="small" bg_color="#000000" color="#ffffff" text="text here" title="title here" url="#" position="left"]
Description: use to display simple button. you can use small, medium, large, xtra lareg sizes.
Round Button
[round_button style="light" text="text here" title="title here" url="#" position="left"]
Description: use to display round button. you can use light or dark style.
Horizontal rule

[hr]
Description: used to display a horizontal line.
Succes Message Box

[message type="success"]This is a sample of the 'success' style message box shortcode. To use this style use the following shortcode[/message]
Description: use to display success message box. you can also use error, warning, info, about types.
Search
[searchform]
Description: use to display search form.
List Style
[unordered_list style="list-1"]<li>List style 1</li>[/unordered_list]
Custom Widgets
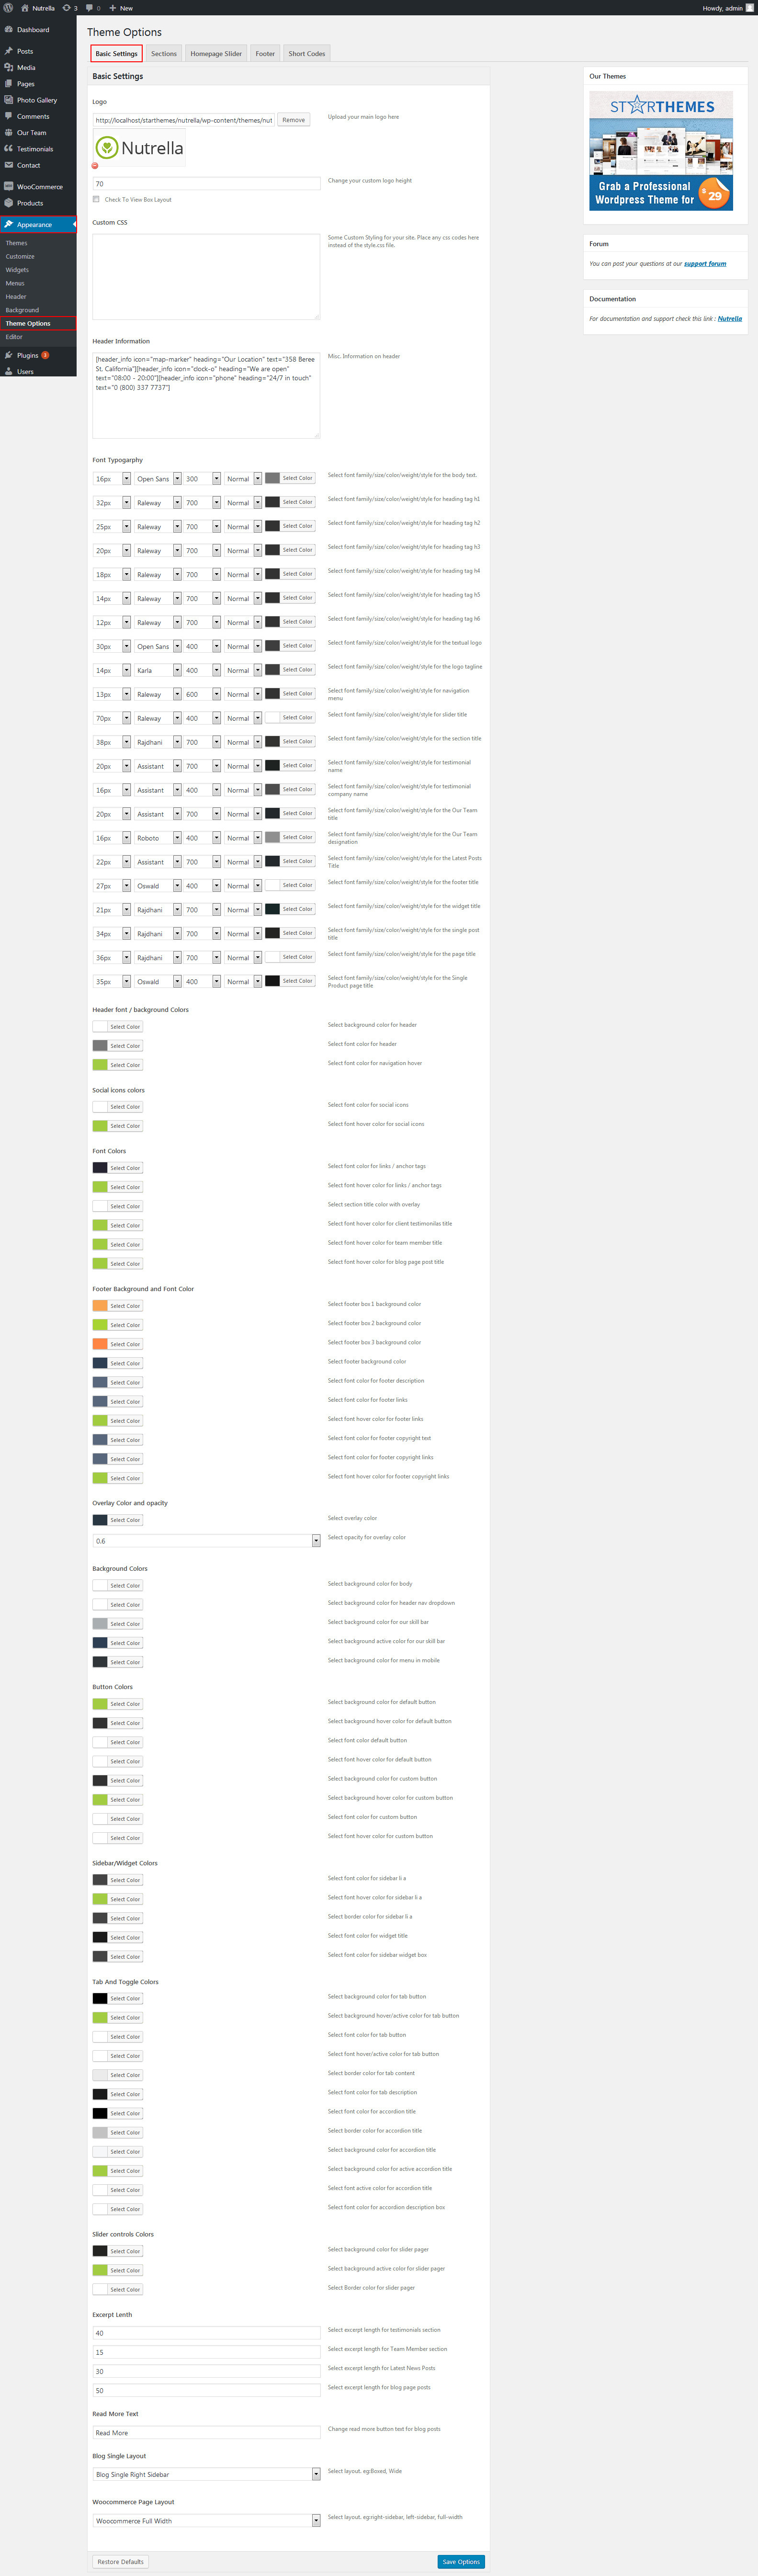
Theme Options
The following theme contains the Settings option. These settings allow you to change the theme’s color palette, order of items, turn items on/off and do lots of other things. In order to use these settings, please go to Appearance → Theme Options.
Basic Settings
Sections

Slider Settings
Footer
Shortcode
Contact form plugin
The following instructions are for setup Contact Form Plugin
Follow below instruction to use Contact Form Plugin.
Plugin Installation
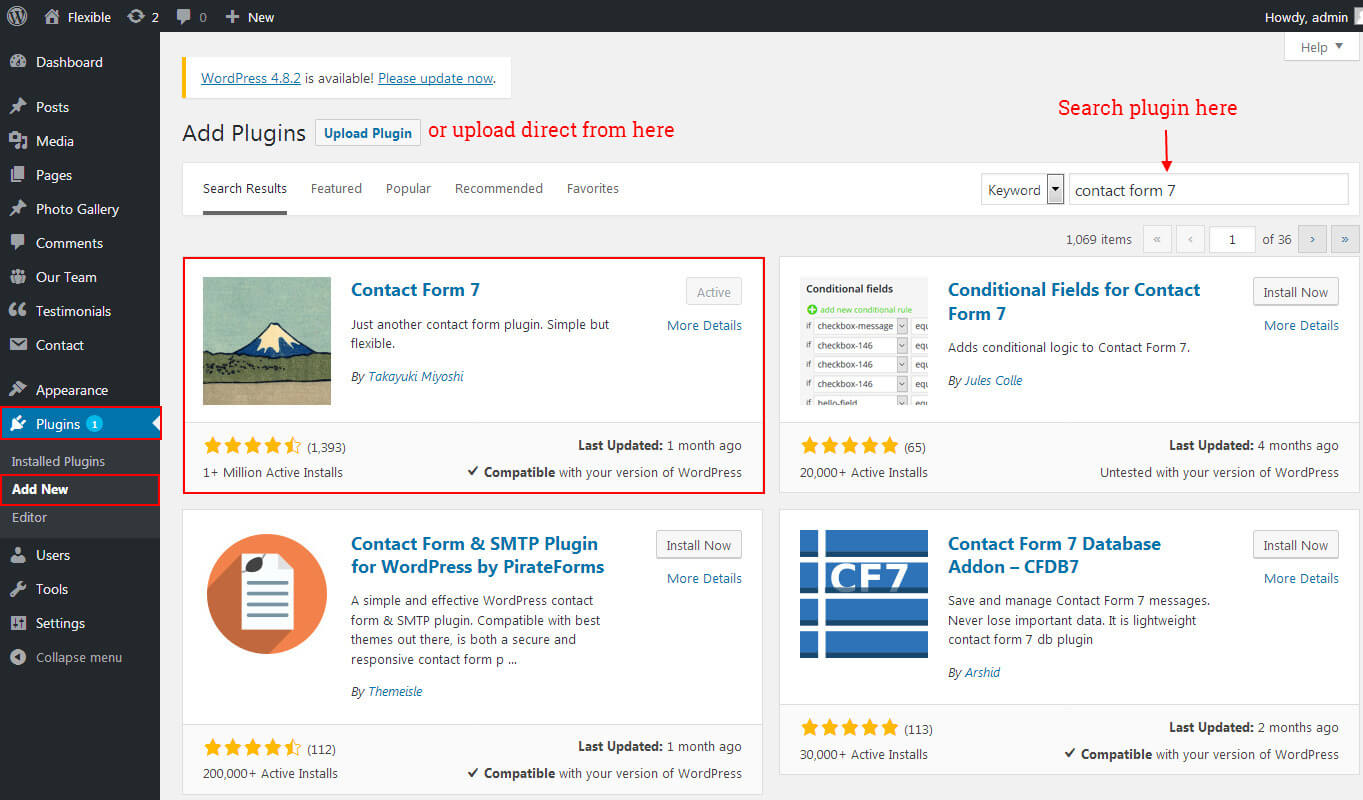
- Go to Plugins >> Add New search for plugin Contact Form 7 and install it in your wordpress dashboard.
- After that you'll see Contact menu menu in left sidebar menu list.
Follow below instructions...
Plugin Use
Get Code for front page Appointment form
<div class="appointment">[text* nme placeholder "Your Name"][email* cmail placeholder "Your Email"][tel* numb placeholder "Your Number"]<div class="clear"></div>[submit "Submit Now"]</div>
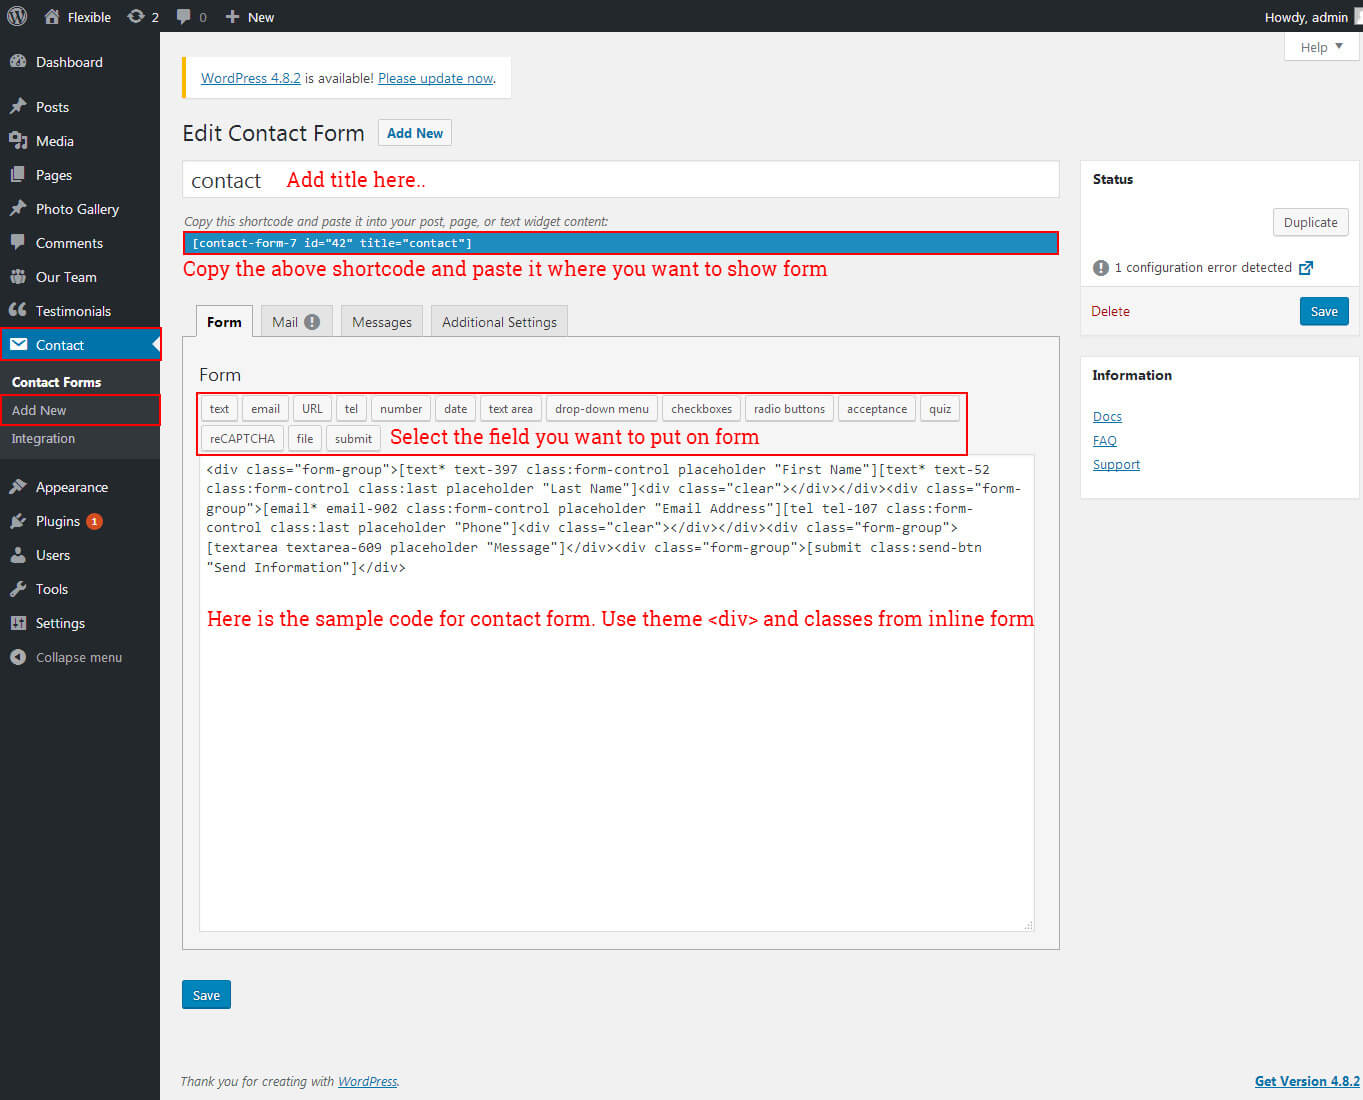
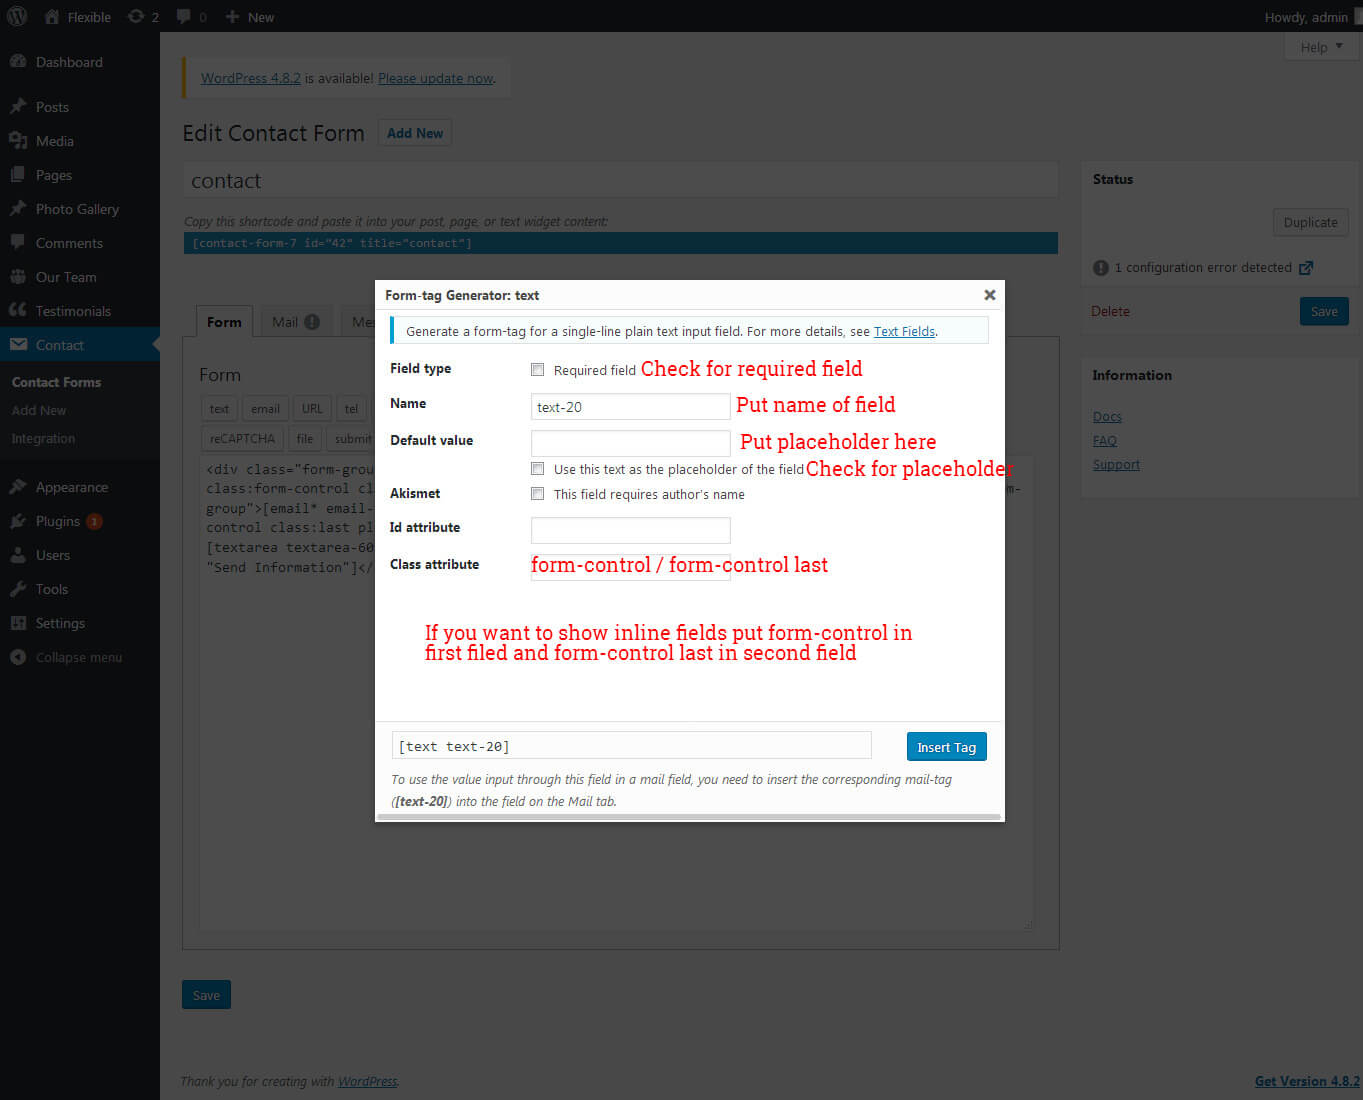
Get Code for Contact page form
<div class="form-group">[text* fnam class:form-control placeholder "First Name"]</div><div class="form-group">[email* email-902 class:form-control placeholder "Email Address"]</div><div class="form-group">[tel tel-107 class:form-control placeholder "Phone"]</div><div class="form-group">[textarea textarea-609 placeholder "Message"]</div><div class="form-group">[submit class:send-btn "Send Information"]</div></div>